Showing posts with label Art Journalling. Show all posts

Wednesday, 6 November 2019

We are all out of bubblegum - Art Journal Page by Elisa Ablett


Hi stamp lovers!

Elisa here again with my latest project for Ink Art Designs, a mixed media 'cheeky penguin' art journal page!

My youngest son is in love with penguins, having completed many a school project on them and also seeing them at wildlife parks. We also love the penguins in the movie Madagascar and when I saw this stamp I knew I had to have it in my collection.  So many cheeky quotes and sayings come to mind lol.

When I positioned the penguins on my page, I wanted them to look like they were staring at the reader to sense the 'impending violence' from the penguins after their gum had run out. I think the gel printed circle in the background works well with highlighting them.

Let's take a look at the products used to complete this page.


Image result for darkroom door grunge marks


Other products used:

Paper Artsy Paints
Circle Gel Plate
Black Soot Watercolour Ink - Colour Blast
Versafine Ink - Black
Fine Black Marker
Circle Template


To start my page, I used a 4 inch circle gel plate and Paper Artsy paints to create my sunset.
Smooth a small amount of yellow, orange and deep red over your gel plate with a small brayer until the edges of each colour have blended. Then lay a stencil down over the top and brayer a small amount of white paint through. Then lay your paper down and smooth over the top with your hands to get your print. Once dry fussy cut the circle out and using circle templates and a black marker, make grungy circles over your sunset.


Stamp and colour your penguins, then once dry fussy cut them out and put them aside until you are ready to adhere to the page. 

My next step is to glue my sunset down onto my page, then go around the circle with black ink and spritz with water. Dry the black ink and now you can add your grungy stamping and stencilling. 

I added some black grungy lines to make a 'horizon' and drew a cityscape free hand in the back ground to make it look like they are standing in front of a city.


Add some scribbly writing, more grungy stamping and your title and lastly your penguins!

Your art journal page is complete.

Don't forget to stop by the Ink Art Designs Facebook page https://www.facebook.com/groups/InkArtDesigns/ to join in the monthly 'pretty much anything goes' challenge. 

Thanks for stopping by my blog today x

Hugs 

Elisa 


Wednesday, 19 July 2017

'The Blue Divide' Art Journal Page by Elisa Ablett

Hi Soul Sisters, 

Elisa here from the design team for Art and Soul Studio with my latest project which I based around this month's soulful project quote.

 the link to the facebook album is here for your entries - July Soulfull

there is a $75 voucher to the store up for grabs so get your entries in.

Image may contain: text


Here is my project, a very personal mixed media art journal page inspired by the quote and featuring products from Art and Soul Studio Store.

To me it symbolises the swirls of thoughts through our brains, the struggle between anxiety and panic and happy cheerful thoughts. How something so beautiful as your brain can be a little dented and scratched, so to speak .... 


Here is a close up of the thoughts, words cut from an old book.


I wanted to show you how I achieved my page using some of the materials from the store.


Step 1 - Using a new Mixed Media Journal from X-press It, it has beautiful 300gsm aqua paper! draw a face silhouette with a waterproof black marker, add a circle and line down your page where you want to showcase the line drawn between your thoughts in your head... (more symbolism)


Step 2 - Grab your desired colours of acrylic paint - I used Vicki Boutin Mixed Media Acrylic Paint available from the store on the link below. The colours are glorious! and it spreads like margarine.
Using a palette knife or silicone spatula spread the three colours inside the circle on your page and let dry.


Mixed Media Acrylic Paint 1.7oz 4/Pkg: SET 2


Step 3 - Using an old sheet of music paper and a sheet of patterned paper (Abstract Art by Kaisercraft - Basecoast 4 collection) tear small strips of the papers and use to build the silhoutte's clothing on the lower half of the page plus also part of the background on the right.


I also used the patterned paper and using a new bohemian flower die from the store, I diecut my flowers and put them aside for later.

Cherry Lynn Designs - Mehndi Botanicals 4


Step 4 - Using a paint brush add a small wash of gesso over the top of your patterned and glued paper to dull the colours a little. Then grab your favourite watercolour inks and spray bottle and a paintbrush add colour to your silhoutte page on the right side. I used the FABULOUS ecoline inks available in store individually or in packs of 6 or 10 colours. - 

Ecoline Liquid Watercolour: SET OF 10


Step 5 - Use a large paintbrush and water as well to add a wash affect over the top of your inks.


Last steps - Once your page has dried and you have added all the colour inks you want, using a versafine inkpad which is archival, stamp around your circle and line to create depth on your page. 

Also add your title, either handwrite or use stamps as I have using the same black versafine inkpad.


To finish - add your die cut flowers, eyes that i ripped from a magazine and some important words from an old book to represent the war our brain sometimes has when we are anxious, sad and confused and stressed.


Add some finishing touches like colour to the lips or outline your flowers to give them more depth.

And you are finished!!

Hope you have enjoyed my project and the tutorial, the quote immediately 'spoke' to me and I wanted to create a page that symbolised the real struggle that a lot of people go through with the warring thoughts in their minds. Art is Therapy.....

Make sure you leave me some love and head on over to the store to check out the amazing products the store is stocking to help you on your artistic journey...

Elisa xx


Thursday, 24 November 2016

Make each day your Masterpiece by Elisa Ablett

Hi Crafters,

Elisa here from the Design Team for Memory Maze Lasercuts with my next share for this month.

I found inspiration for my project in a oil painting that I saw on the internet and loved the colours so much i decided to replicate them. Plus it gave me a chance to crack open my new set of Prima Confections Watercolour Pans, the colour in these little watercolour sets are amazing!

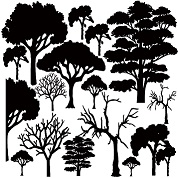
Here is my double Art Journal Page that I created with the theme of making each day your Masterpiece. Monday through to Sunday. Featuring Memory Maze 12 x12 sheet of chipboard Trees and Memory Maze Stencils (Micro Dots and Crackle) which can be found here at the -


Here is a list of the other products used in my project:

Prima Confections Tropicals, Dylusions Paints, Colour Blast Australia Pastes in Rose Petal and Bling, Colour Blast Shimmer Spray in Bling, Gesso, Dorlands Wax Medium, Art Foamies Stamp (writers block), Carabelle Stamp and Kaisercraft Stamp.


Here are some close ups of the pages, for the finer details. 

TIP - I painted the trees with Black Dylusions Paint then while wet press face first down into the reflection of the sunrise making the trees have a mirror image.


12 x 12 just trees,trees,trees, 300 x 300mm


Crackles Stencil 150 x 200

Mini Stencils  micro dots   100 x 100mm  min buy 5 priced as eac


Thank you for stopping by the Blog today. Make sure you leave some love 😀😀

Wednesday, 9 November 2016

To Come Alive - Art Journal page by Elisa Ablett

Hi Crafter's,

Elisa here from the Memory Maze Design Team again, just sharing a recent blog post on the Memory Maze blog. A colourful Art Journal page featuring some lovely Memory Maze Chipboard and a grunge stencil.

I wanted to achieve a different look with this Art Journal Page with the colour and texture only in the background whilst keeping the gorgeous Chipboard white, clean and simple.


To achieve this look i gesso'd the chipboard pieces white and laid them aside to dry. I have found a wonderful gesso in a spray can and is a life saver!!

I then tore strips from the Newspaper and included a title of To Come Alive which i pieced together from the Newspaper, I then gesso'd over the top of the newspaper to provide a bit of texture.

Then i used Colour Blast Shimmer Dusts and a splatter technique, splatter drips and drops of the gorgeous shimmer dusts which you have diluted with a small amount of water all over the areas in which your chipboard will sit.

I then splattered Bling Colourblast Shimmer Spray as well. I stamped several texture stamps and flower stamps over the top of the colour and then using a palette knife i spread Bling Colourblast Texture Paste over a Memory Maze Stencil.

Here are some close ups :-) 


Here are some of the gorgeous products i used from http://memorymaze.com/


Butterfly lady 8x8


Dots and stuff  poly template  8x8 sold in 3\'s

Colour Shimmer Dust - Peacock


Thanks for stopping by the Blog today :-) 


Elisa xx


Friday, 6 May 2016

Off the Rails Scrapbooking May Blog Hop


Hi Everyone, welcome to the Off the Rails DT Blog Hop!!!

Here is your fun and bright moodboard....


Here is my take on the FUN BRIGHT Blog hop moodboard....a very vibrant and bright rainbow inspired art journal page using Colour Blast Paste and Sprays and Daler-Rowney Acrylic Inks.

I came across this quote from Maya Angelou a while ago and i loved it. It does not cost anything to be happy, supportive and encouraging to someone who may be feeling down or having hard times, that's my take on that quote....


And some close ups of the amazing colour shimmer and shine with Colour Blast Paste and Sprays

Other products used: Black Acrylic Paint, MFT Dies and Stamp set, Gauze, Vellum, Dina Wakely Stamp and stencil,  


Team A will start us off today Friday May 6-8 through Sunday. 

Please visit each blog and leave a comment as your hopping along. 

Elisa Ablett - http://2crazycrafters.blogspot.com.au/... YOU ARE HERE NOW

HEAD ON OVER TO HERE NEXT -
and end here on the OTR BLOG: http://offtherailsscrapbooking.blogspot.com/... 
and leave a comment for your ballot to random draw to win a great prize.


Please don't forget to follow me and leave some love!

Thanks for participating in our blog hop...


Saturday, 2 April 2016

Off the Rails Scrapbooking - April Challenge By Elisa Ablett DT

Hi everyone,

Elisa again, sorry to bombard you with layouts in the last few days, but blogger is working for me today and I'm running with it!!

I just wanted to share with you the double Art Journal page I was inspired to create as my Design Team piece by the moodboard for Off the Rails Scrapbooking - April Challenge
Here is my Art Journal double spread -


And some close ups of the shimmer and glimmer of the Colour Blast Pastes and Sprays and Tim Holtz Distress Stains. Stay tuned for my Tutorial showcasing how I completed the background for this Art Journal page on the 5th April 2016.


Thanks for stopping by, make sure you leave some love and stay tuned for my tutorial
on the 5th April :-)


Thursday, 4 February 2016

Kraft Plus February Challenge - Going Postal - DT Reveal

 
Hi Crafty friends,
 
Elisa here again sharing my first ever Art Journal two page spread that I completed as part of the DT for Kraft Plus Challenge Blog - February Challenge.
 
Here is the amazing challenge board, Kraft base plus Lots of Postage Stamps.


and here is my Art Journal pages:


The idea for these pages came from a postcard that I saw in a shop that had a caption on it that said 'from where you would rather be' with a picture of a man surfing at a beautiful beach. I immediately thought of completing a page about me dreaming of a holiday or perhaps 'my happy place' which is in the sun at the beach surrounded by my family and my camera. I used loads of postage stamps in the background for the beach and in the sun as well as I cut up a few stamps to add depth to the pages hence you will see Santa surfing, a crab, a plane, someone swimming and the Opera House. All the stamps were handpicked by me and all feature photos of Australian places, plants or animals, all places and things I would love to see in a mammoth trip around Australia one day.
Make sure you click on the link above and head on over to the Challenge site to view the design teams amazing reveal, lots of wonderful inspiration.
 
Thanks for stopping by ....
 

'Frosty' by Elisa Ablett

  Hi Crafters, Elisa here from the design team for Ink Art Designs with the first of my 'Christmas in July' projects. For this proje...