Friday 30 March 2018

'Transform' by Elisa Ablett

Hi Everyone,

Elisa here from the design team for Scrap Matrix with my latest layout based on the latest Scrap Matrix challenge - textures and layers.

 This is a slightly darker layout than what i usually do but i wanted to create a night cityscape on my background to go with the cityscape in the glasses of the snap chat filter in my photo.

Some of the textures and layers that I used to create this layout include - Prima Finnabair Metallique Wax in Aged Brass rubbed over a black embossed card stock, Black Pico Embellisher used to create scribble writing and to add details to the background, Dina Wakely Scribble Sticks (Yellow) to hand colour the butterflies, Black Dylusions spray to create splatters, Black 13 Arts Water Ink to create the horizon for my cityscape. 

All of the products can be found in the Scrap Matrix Store or be ordered through Vicki from Scrap Matrix.

I hand drew the buildings and bridges and houses with a black marker and using a paintbrush i coloured in the windows to match the touches of yellow, gold and brass in my layout. If you do not feel confident with drawing your buildings, Vicki has a great selection of City Buildings Stencils or there is the new Stamp Set #52 from Aall & Create that has buildings as well.

Sometimes its good to step out of your colour comfort zone I think!

The link to the Texture and Layers challenge in the Scrap Matrix Share group is below:-


Products used from Scrap Matrix Store - Links underneath the photos!


Stamperia Double-Sided Paper Pad 12"X12" 10/Pkg Blue Stars


Y


undefined


http://scrapmatrix.com/ayeeda-water-ink/

That's it from me today, I hope that i have encouraged you to try a different colour combination on your next layout, maybe go a little urban perhaps!

Hugs xx

Elisa 
Wednesday 21 March 2018

'Use your wings' by Elisa Ablett

Hi Crafters !

Elisa here from the design team for Visible Image with my latest project. 

I wanted to create a whimsical mixed media board using the gorgeous 'Believe in Unicorns' and 'Angels are Near' stamp sets from Visible Image.

I used Distress Oxide ink pads to create a chalky oxide background for my moonscape and I hand dyed the gauze to create a textured 'grass'.

To create the fairy wings I used Dina Wakely Scribble Sticks directly onto the stamps and spritzed with water! and then once dry I then stamped again over the top with a different colour.


Here are some close ups for the finer details.


Here are the stamp sets from Visible Image, click on the links to see the stamps in store today!


Thats it from me today, make sure you head over to the shop to have a peek at all the fantastic stamps and stencils!

Elisa xx


Saturday 17 March 2018

Gel Printing and Scrapbooking by Elisa Ablett

Hi everyone

Elisa here from the design team with my first share based on the new monthly challenge over at Scrap Matrix Shares group.  'Textures and Layers'


So lets talk Gel Plates!! do you have one and use it for Art Journalling? Not sure how you can use it on a scrapbook page ? My layout below uses a gel plate plus different types of paper to create a layered background for my mixed media layout. 

To start I gathered together plain white cardstock and deli paper and a glossy white paper much like yupo paper. I also used a lovely triangle stencil from 13 arts to use on my gel plate prints.

I created about 6 different monoprints using my dylusions paints, using the stencil as a mask, i waited for my prints to dry, i then fussy cut my triangles out. With the background I tore my brightest prints and layered them in the bottom left and middle right of my page, gluing them layer by layer. The deli paper i used a clear drying glue stick to avoid wrinkles.

Add some stamping and stenciling over the top to create further layers and texture.

I also added some splatters with Blue Bayou Mica Powder with a bit of water. With the extra liquid i created I painted my chipboard title as well :-) 

I am thinking about doing a process video to show you how I create my prints, let me know if you all would be interested 👍👍


Some close ups of the finer details for you - 


Image 1


AALL Stamp set #10


6x6" 13 Arts - Triangles - Color Basic


Hazy Days Elements 6x12"


Blue Bayou - Primary Elements - Mica Powder


That's it from me today 

Hugs 

Elisa xx


Wednesday 7 March 2018

'Glimmer of Light' by Elisa Ablett

Hi everyone,

Welcome to March with the Visible Image design team and blog.

I am up on the blog today with a mixed media canvas made with the backing board from an old paper pad, I love to repurpose items when i get a chance.

I loved the look of this stamp set when I first saw it, so versatile and a little bit grungy for those art journal pages and canvases and a fantastic verse to use as well.


To create the stamped moths I used Dina Wakely scribble sticks rubbed directly onto the stamp and spritzed with water and then stamped on watercolour cardstock. I added a darker colour over the top to add dimension and then once dried, I added highlights with Glossy Accents. I get a fantastic impression with Visible Image stamps each and every time.

The background was created using beautiful Turquoise and Gold Metallic Wax from Finnabair. The Gold wax was rubbed through the Strobe Stencil to create rays of light behind the light bulb.

A friend gave me a few pieces of black cardstock that had been embossed with a 3D hexagon pattern, I fussy cut them up and stuck them to my background which i had painted black. Then i rubbed the turquoise wax all over the background and added the Strobe Stencil along with Gold Wax.


I wanted to show you the amazing colour you can get from a few coats of the waxes when they hit the sunlight! look at that blue, just gorgeous.  Makes those stamps pop!

Here are the Visible Image stamps that i utilised for this project.


Well that's it from me today, thanks for stopping by the blog :-) 

Hugs xx

Elisa


Thursday 1 March 2018

'Lovely' by Elisa Ablett


Hi Krafters,

Elisa here from the design team for Kraft Plus Challenge Blog with my latest layout based on this months current challenge!! 

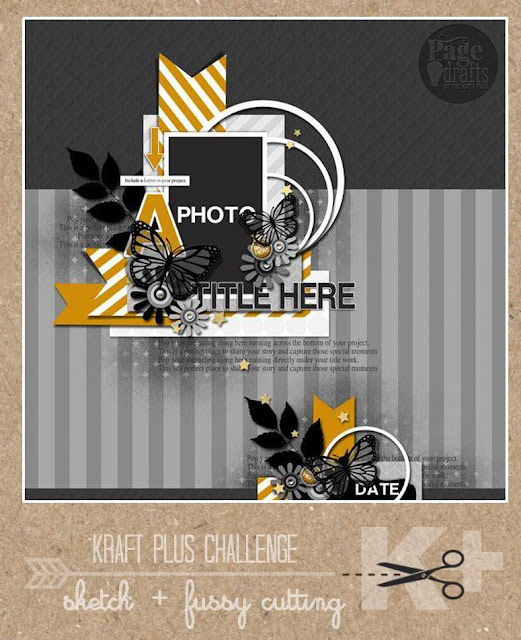
The Sketch plus fussy cutting :-) 

As you can see from my layout I flipped my sketch to the left and added a few pieces here and there.

My background consists of a gelli plate print with a Stencil Girl Stencil a gorgeous rich purple paint.

I think i will revisit the kraft, purple, lilac and sky blue colour scheme again, it has to be one of my favourites.


Here are some close ups! 

You can see my fussy cut flowers trailing down the left side of my photo cluster.


and some fussy cut butterflies...


Thanks for stopping by the blog today :-) 

Hugs xx


'Frosty' by Elisa Ablett

  Hi Crafters, Elisa here from the design team for Ink Art Designs with the first of my 'Christmas in July' projects. For this proje...