Showing posts with label Shop and Crop Scrapbooking. Show all posts

Tuesday, 21 November 2017

'Beach Babe' and 'Seaside Escape'

Hi Everyone,

Elisa here from the design team for Shop and Crop Scrapbooking with my latest layouts featuring the November Cropaholic Kit and bits and pieces from my stash.

This is the link to the kit in the shop. Make sure you use the code EA5 if you put in an order to Shop and Crop Scrapbooking.


designed by the lovely Belinda Lowe and featuring 

This months kit includes:
  • 1 49 & Market Sea Sand and Sun Collection 12 x 12 Paper Pad Collection
  • 1 49 & Market Sea , Sand and Sun Embellishment Sheet
  • 1 set of Scrapmatts Chipboard
  • 1 Colourblast Shimmer Spray
  • Specialty Mix Media Texture.
  • exclusive embellishment pack 
  • Cardstock
  • 1 Bubble stamp
  •  Subscribe today for this fantastic kit.

Here is one of Belinda's fantastic designs


I was lucky enough to be able to design a few different layouts with the kit as well and this is the first of my designs! If you are a subscriber, as a bonus you will have access to my step by step instructions for this layout 'Beach Babe'.


Here are some close ups!!


Just look at all those goodies that you get in the kit, I made two layouts and have plenty leftover for many more ...

and my second layout using this awesome kit....

Titled 'Seaside Escapes'


Here are some close ups of the finer details.


Well that's it from me today, I hope you have enjoyed seeing what you can create with your kits and a few extra pieces.

Hugs xx

Elisa


Tuesday, 7 November 2017

Heart by Elisa Ablett

Hi all,

Elisa here from the design team for Shop and Crop with my latest layouts, a mixed media layout based on the November moodboard and a colourful mixed media layout using the flowers I made using the Tinby Designs - Colour Crush Powders.

We would love to see your entry to the latest challenge - here is the link!


Here is my layout - you can see that i used the colour scheme and tried to pick up the texture from the moodboard by using Prima Pebbles.


A great technique for you to try is to stick old paper flowers down over your wet background and soak up the liquid leave them to dry and they will stick to the background without using glue. Then add splatters of your chosen colours over the flowers.


I then added some coloured cotton and art pebbles by Prima ( i glued the pebbles down).


add your photo and gesso'd chipboard and you are finished.


and here is my second layout - using loads of products from the store plus pieces from the  october-2017-cropaholic-kit-one-off-purchase.

This fab kit has 
  • 1 x Flutterby Flawsome Collection Kit
  • 1 Scrap Fx Stencil
  • 1 pot of Colourblast Envy Shimmer Paste
  • 1 pot of Lovely Lilac Embossing Powder
  • assorted fibre pack
  • 4 pieces of kaisercraft cardstock

I used pieces from the Kit, plus my flowers, a die cut and the background was created using two fantastic colours from the new 


I created the large poppy flowers by using the techniques I demonstrated in my technique video the link is below.


Once I had stamped my flowers and let them dry I then fussy cut them out to use on my layout. I layered them using 3D mounting tape and splattered watered down Dylusions Cut Grass paint over the flowers to tie it into the background.


Here are some close ups!


Dylusion Paint - Peony Blush
Dylusions Paint - Cut Grass


Blood Orange Color Crush Watercolour
Raspberry Color Crush Watercolour


Thanks for stopping by the blog today, don't forget if you visit the shop to use the code EA5 at the checkout to receive your special discount !

Elisa

xx


Sunday, 29 October 2017

October Mixed Media Kit - By Elisa Ablett


 Happy Weekend everyone!

Elisa here from the design team for Shop and Crop Scrapbooking with my layout designed for the awesome 'october-2017-mixed-media-mania-kit' plus a few sneak peek photos of my 'experiments' with the mica powder prior to starting my layout.

The October Kit was designed by ME!!
and contains the following:
1 pot of Colour blast Singing The Blues Mica powder
1 pot of Colour blast Tangareen Dream Mica Powder
1 Scrapfx Stencil
1 piece of Cocoa Vanilla TOtally Rad PP
1 6x8' Cocoa Vanilla Studio You Rock Sticker Sheet
1 pieces of white mixed media cardstock
1piece of Black Cardstock
30cm of Green Tara Black Cobweb Ribbon

plus instructions to complete the layout below!

If you would like to purchase the kit, head over to the shop - october-2017-mixed-media-mania-kit-one-off-purchase and at checkout use the code EA5 for an added discount!! 


Here is the awesome Scrap Fx stencil - Cool Circles
Cool Circles stencil

Two Colourblast Mica Powders.

Pop Up Image


Pop Up Image


Before i started the layout i wanted to have a little play with the mica powders to decide on which direction i was going to go, so i mixed the mica powder with modelling paste, gel medium, water and i was also going to emboss with it.


When using the Mica powder with gel medium i found the colour to be very strong and also dried to a glossy almost enamel finish. Also i added water to a small spray bottle and added a small amount of the powder in the water and as you can see from the left side of my experiment sheet, the results was a lovely shimmering spray.


I decided on using the powder mixed with modelling paste for my layout, modelling paste in my opinion is one of the best to put through a stencil and doesnt dull the colour of the powder too much.

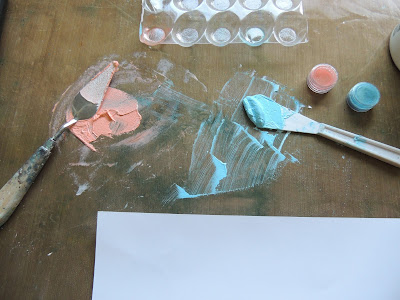
So on a craft sheet i mixed the powder with a small amount of modelling paste and folded it over and over with a palette knife, adding more powder to increase the vibrancy of the colour. Then apply through the stencil on your layout.

Its a fabulous kit to learn more about stencilling and mica powder and mixed media techniques.


Here are my close ups!


Thanks for stopping by the blog today!

Elisa 

xx

Saturday, 21 October 2017

Dream Big - By Elisa Ablett

Hi Everyone, 

My turn up on the Shop and Crop blog today with something a little different for me - BACK TO BLACK!

I don't normally do a black cardstock background but with the Distress Oxide Inks, an awesome stamp set and a cool technique or two and the I just wanted to try one.


Here is a step by step tutorial on how I made the gorgeous flowers with the distress oxide ink pads.


Step 1 - using a nice smooth black cardstock, ink the middle of your stamp with the 'wilted violet' oxide ink pad and the the outsides of the stamp with the 'picked raspberry'. Then using the smaller of the stamps use 'cracked pistachio' ink pad. 


Step 2 - Stamp all over your black cardstock, as you can see the Oxide Ink pads stamp beautifully over the black and come out in almost chalky neon colours.


Step 3 - Smudge your ink pads onto your craft mat and spritz with water liberally. Then using a paint brush splat and drip the liquid onto your cardstock over the top of your stamped images.


Step 4 - Add a bit more colour to the page by turning the cardstock upside down and dipping the flowers into the liquid on your mat and smoothing the back of the page with your hand. A close up below.


Step 5 - I also used the paint brush to add shading and colour to the inside of the flowers. 

Then lastly once they have dried, I fussy cut the flowers out and then using a white gel pen added white dots to the middle of the flowers as you can see from the close ups!


Here are the close ups for the finer details!


Here are the products used to create my layout from the Shop.


Prima Bloom Floral stamps only available in the one off mixed media mania kit.
Image result for prima bloom floral stamps


Preorder : Tim Holtz Distress Oxide Ink Pad Bundle 2


Thanks for stopping by the blog today 😀

Elisa xx


'Frosty' by Elisa Ablett

  Hi Crafters, Elisa here from the design team for Ink Art Designs with the first of my 'Christmas in July' projects. For this proje...