Monday 28 August 2017

'Summer Loving' by Elisa Ablett

Hi everyone,


Elisa here from the design team for Shop and Crop Scrapbooking back with a simple tutorial using the new Tim Holtz Distress Ink Oxides to make a mixed media layout using the leftovers from the August Crop Kit and a few things from my stash.

The Crop kit is chock full of amazing papers and embellishments and so far I have made 4 layouts out of it with leftovers !

If you are after Oxide inkpads or a Crop Kit order through
Kylie at the shop and use the code EA5 to receive a discount on me 😀😀

Kylie and I have come up with a special bundle deal for customers - Buy all 12 colours in series 1 and series 2 colour releases for a special price and receive an even further discount if you use the code EA5 just message Shop and Crop Scrapbooking for the details!!!

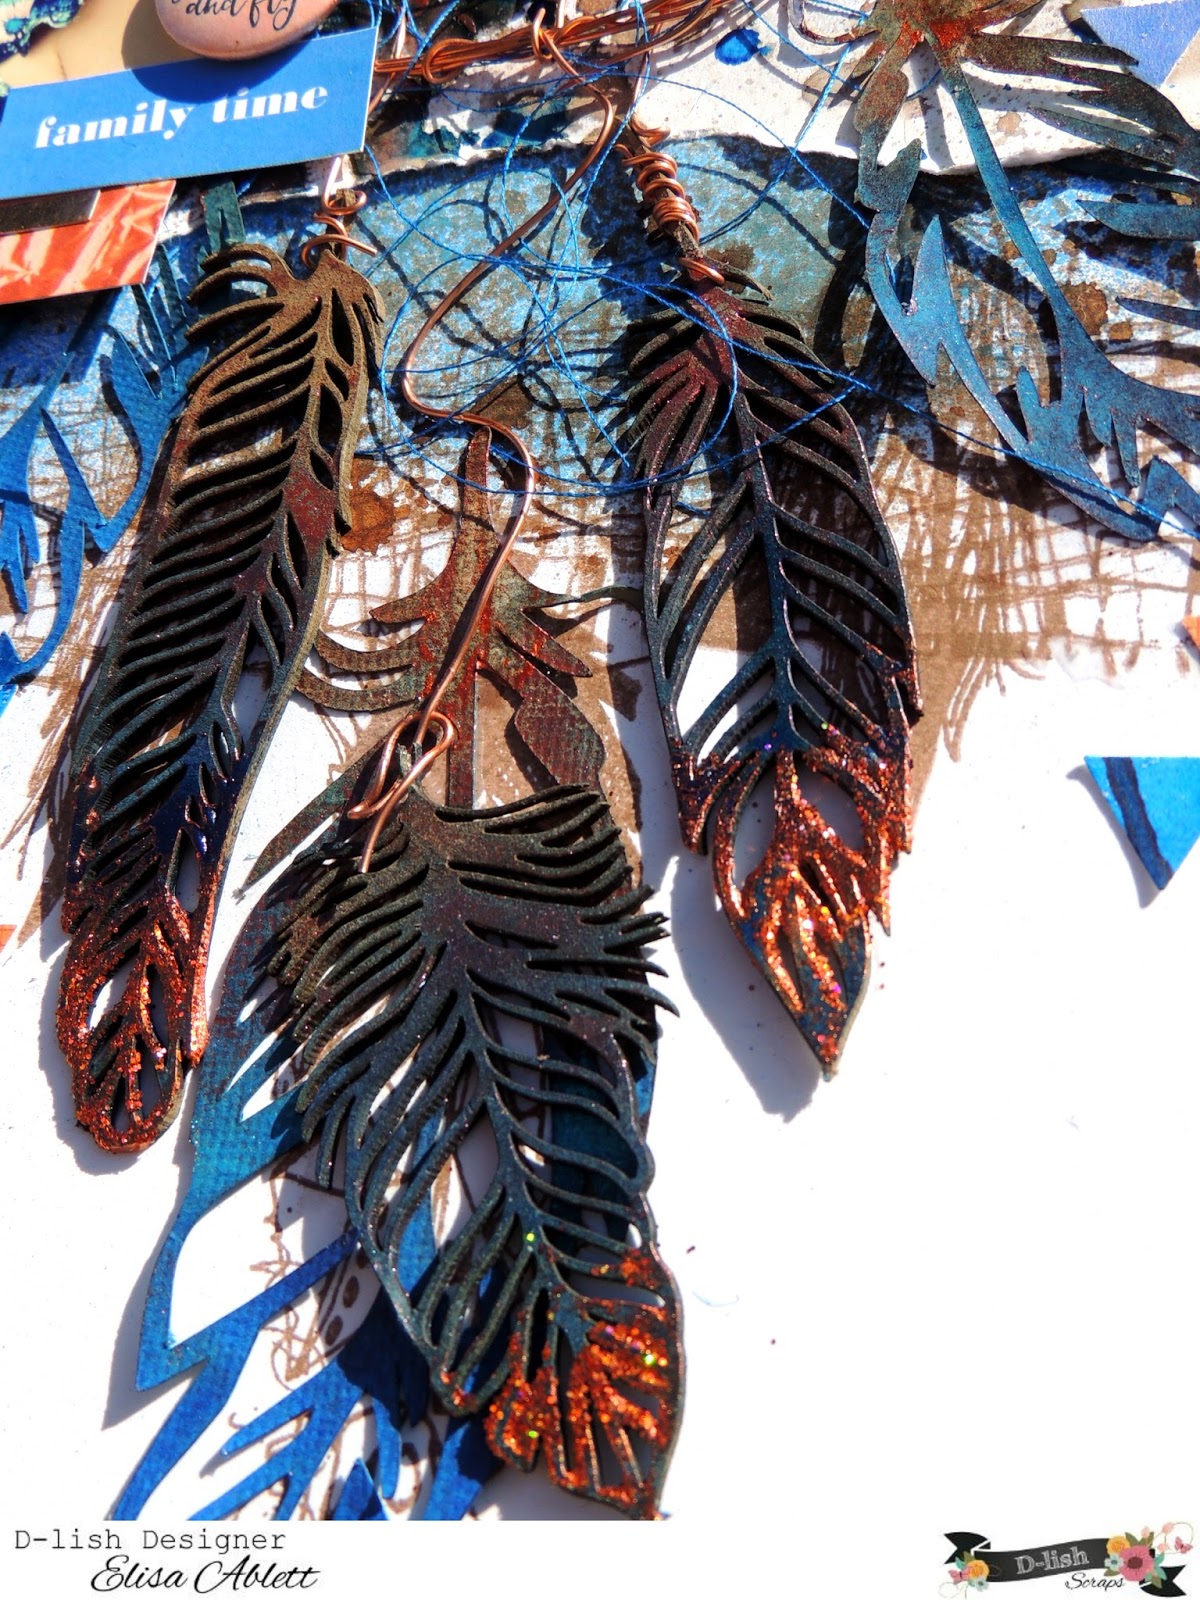
Here is my layout, a mixed media beach inspired layout.


Let's Get on with the tutorial!

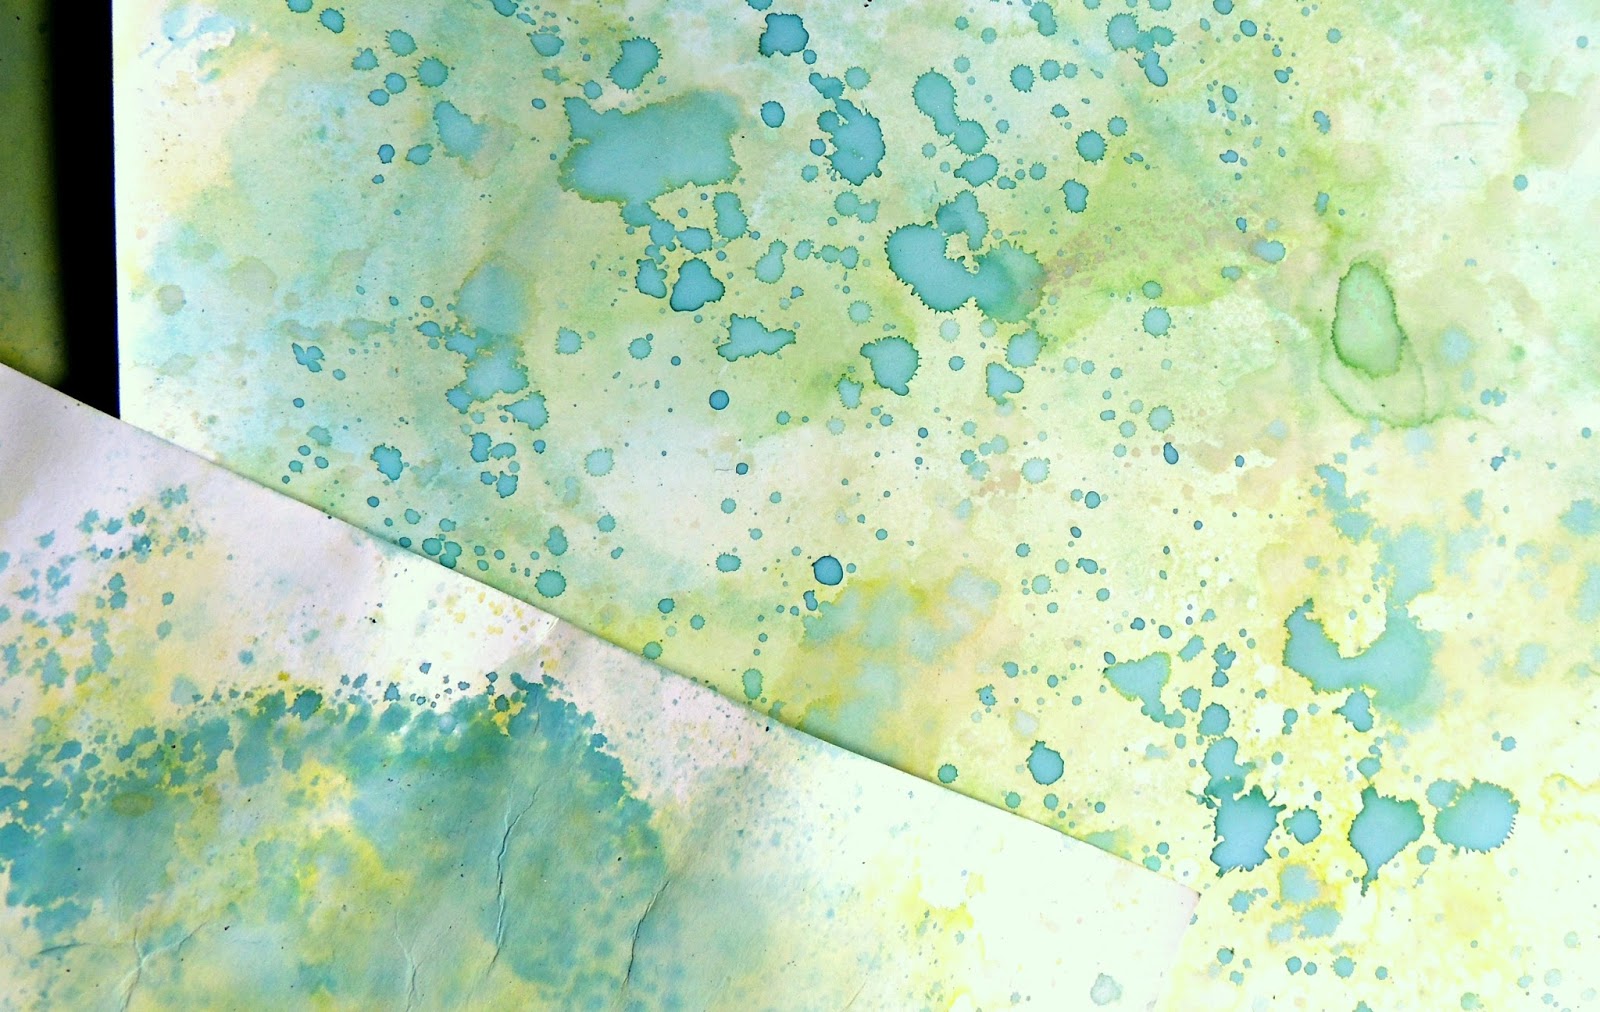
I picked these lovely four beachy colours and grabbed my trusty water spray bottle to begin.

If you are unsure what the Oxide inkpads are and what makes them so crazy special, this is a description coming from Ranger and Tim Holtz -

"Tim Holtz Distress Oxide Ink Pads are water-reactive dye & pigment ink fusion that creates an oxidized effect when sprayed with water. Use with stamps, stencils, and direct to surface. Blend using Ink Blending Tools and Foam. Re-ink using Distress Oxide Reinkers"


Because they have pigment ink blended in with them they will stamp with a fine image, they are opaque so will show up perfectly on a dark surface, you can also layer the colours on top of each other and they still retain the colours and do not turn into brown smoosh. And the best thing is they still react with water like the Distress Ink pads.

I will be showing you a quick and simple tutorial on how to use these wonderful inkpads and how to apply them to a mixed media layout...


Step 1 - Grab your ink pad and smoosh it or wipe it onto your mat (special crafters mat that can be wiped over) spray the colour with water liberally to create large droplets


Step 2 - Turn a piece of mixed media cardstock over the colour on your sheet and place it on the colour. Now to get the droplets you can just pull the sheet back up without rubbing the back of the sheet with your hand or you can rub the back of the sheet to get a different look. Pull the sheet off the colour and dry with a heat gun.


Step 3 - While you are drying with your heatgun, grab a water spray bottle - the distress spray bottle is the best for this job as it releases rather large drops and spray onto your sheet over the colour and you will get this lovely oxidised droplet effect. 


Step 4 - After your first layer of colour, you can now add layer after layer using the same technique!! you will get a multi colour effect with lovely droplets and crazy oxide effect.


Step 5 - At the end you can also add another technique using a fan brush. Smoosh your colour onto your mat, add the water and then using the brush instead, dip it into the colour and tap generous droplets of colour onto your page and dry with a heatgun.

Below is a few examples of the end result of these techniques! perfect to use on a beach inspired layout ....right ??


Here is a few photos on how I incorporated these techniques on my layout.


Adding background colour to my page using the smooshing on the mat technique.


Adding some droplets of Antique Linen Oxide Ink pad to my page.


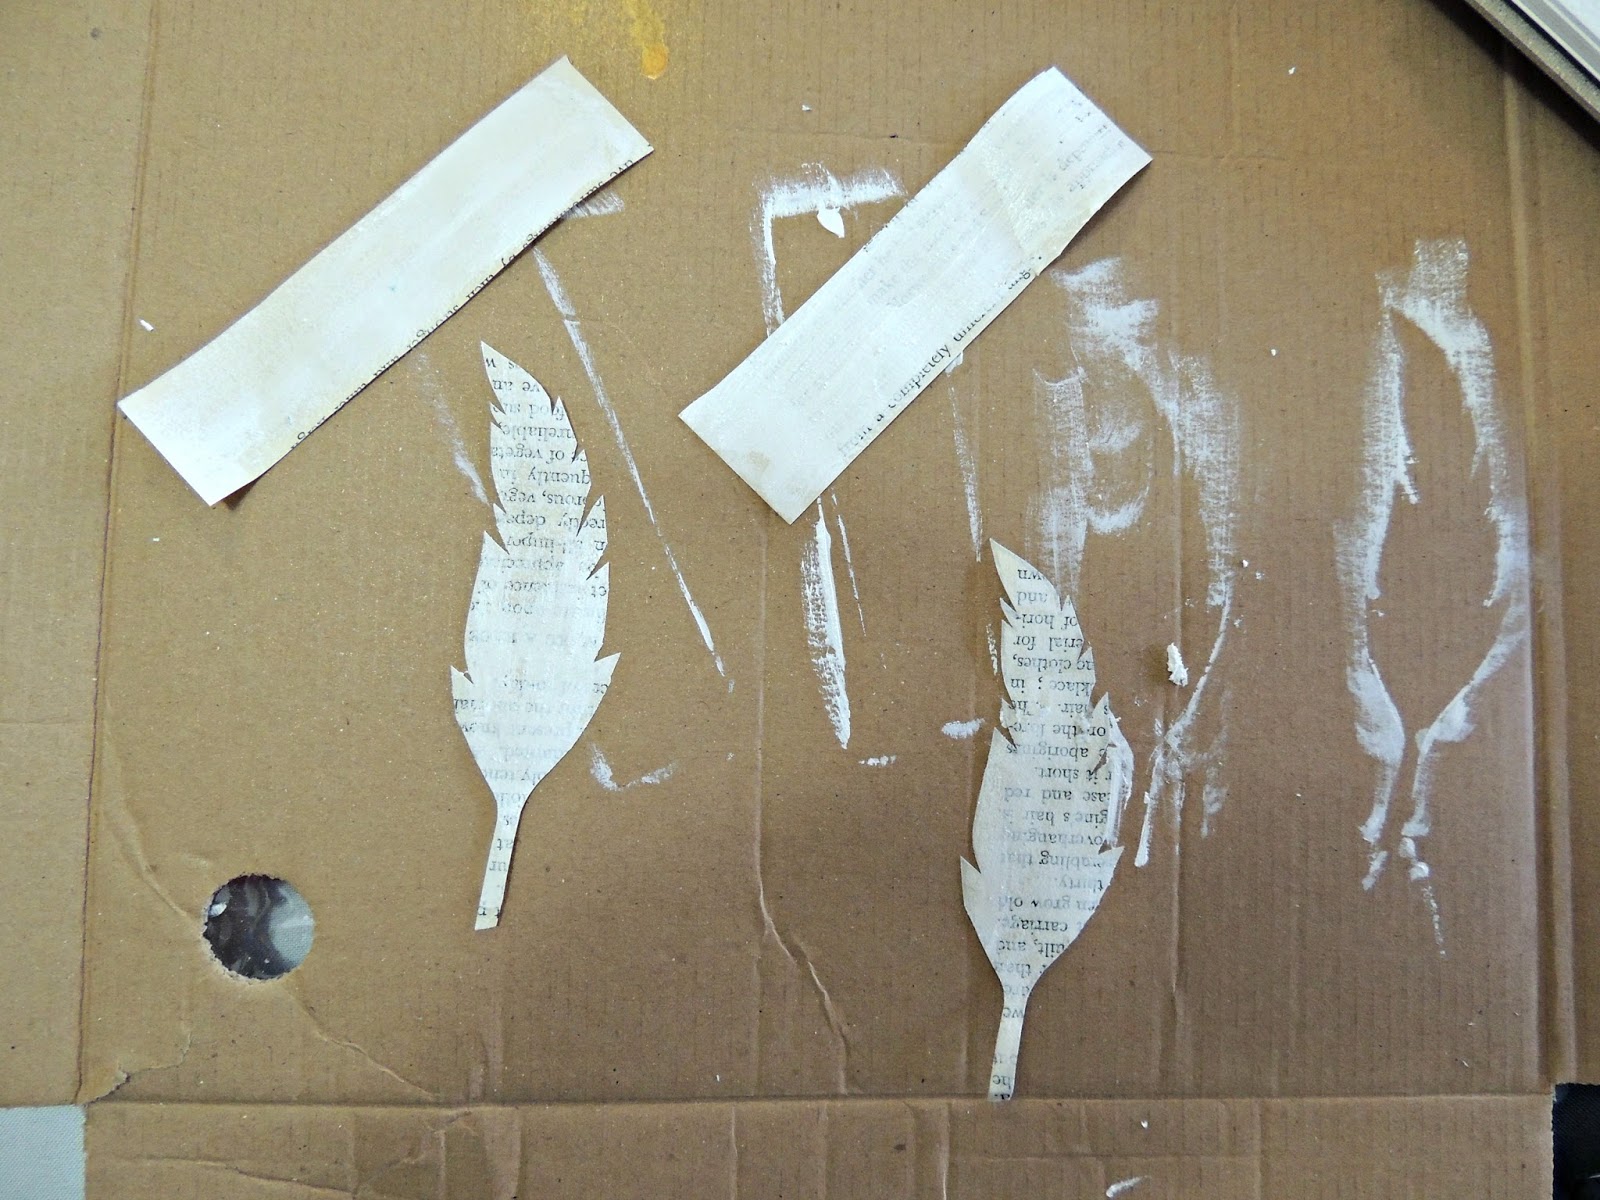
Use the inkpads to cover wood veneer or chipboard and use embellishments like DIY hearts from Charms Creations to mop up the colour on your mat and they will match your layout!!


I also used the technique on a couple of die cut square frames, which is a different and unique way of colouring and adding them to your page.


Add some stamping over your frames...


And here are some close ups of the finer details 


Well that's it from me today, i hope you have enjoyed the tutorial and insight into how you can incorporate simple yet effective techniques into your layouts.


Hugs 

Elisa xx


Saturday 26 August 2017

Some Exciting News!! - Scrap Matrix Design Team Announcement

Hi everyone,

I received some exciting news not long ago and I have been busting at the seams to share it with you all. I have been lucky enough to secure a spot on the first inaugural design team for the awesome scrapbooking and mixed media store - Scrap Matrix in South Australia. 


and I have received my first design team package already and it is chock full of scrapping and arty goodies. 

Stay tuned for all sorts of awesome challenges and creativeness coming from the talented design team!


Image may contain: one or more people and people sitting


I feel very honoured to be apart of this amazing team.

Here is the link to the design team announcement and you can see the other lovely and talented members on the team - https://scrapmatrixblog.blogspot.com.au/2017/08/we-have-team.html

Hugs 


Elisa xx


Friday 18 August 2017

'Spread your wings and fly' by Elisa Ablett

 Hi Everyone,

Elisa here from the design team for D-lish Scraps with my latest layout showcasing the gorgeous range of goodies from the D-lish Scraps store.

I was lucky enough to win a Lindy's Stamp Gang Challenge recently and was sent a prize which included some gorgeous blues and copper colours in the lovely starburst, flat fabio and moonshot sprays, so thats where my inspiration came from. So I scoured through my extensive D-lish stash to find all things blue and copper to go with my colour scheme.

I love all things bohemian and dream catchers so I decided to make my own dream catcher with all the lovely feathers from the store. 

Let's take a look at the finer details of the layout in the close ups below !


Here is a close up of some lovely copper modelling paste through the Stencil---5-x-5---Pattern-Quartet with a palette knife, creating some lovely copper bling and texture on the background.


Some more of the stencilling on the right hand side along with the wood veneer title - Wood Veneer Alphas.


The feathers were made by spraying in layers, blue spray on the bottom and copper at the ends, then a little bit of copper glitter paste on the bottom of the Chipboard feathers. Wrap the wire around to create your circle for the dream catcher and staple to your page. Then add your feathers and the 'strings' of wire to your feathers. Add some blue cotton to the mix and your centre piece.

I added some background stamping using Carabelle Studios stamps and Fiona Paltridge's stamps from Aall and Create to the background to add depth before I glued my embellishments down.

And you have a finished layout.

Well that's it from me today, make sure you leave me some love in the comments xx

Elisa 


Monday 14 August 2017

August 2017 Crop Kit - Alternative Layouts by Elisa Ablett for Shop and Crop Scrapbooking

Hi everyone,

Just wanted to share my latest blog post for Shop and Crop Scrapbooking.

Elisa here from the design team for Shop and Crop Scrapbooking with a different take on the August 2017 crop kit.

Here is the link to the August Crop Kit on the website, it includes papers and bit and pieces from the Hello Sunshine collection from Fancy Pants, ephemera pack, tag and labels and gorgeous lemon thickers.


Now if you are a subscriber you would have received your awesome kit by now with the instructions to create your layouts. I am lucky enough to receive one as well so I can show you a few alternative pages that you can make with the kit AND a few products from your stash!

My first layout is titled - Walking on Sunshine


I used Colour Blast Shimmer Cube in 'Sunshine' and Colour Blast Shimmer Spray in Lipstick to create a few coloured splatters on the background. Then some stamping over the top using a set of stamps by Prima - Ink and Layer in Flora and a lovely script stamp.

Here are some close ups of the layout.


A banner and layering!


Flower cluster to draw the eye to the photo.

💙💚💛💜

And here is my second layout - Soak up the Sun

More of a mixed media layout using the kit contents plus extras from my stash including black Dylusion spray, yellow acrylic spray by Marabu Art and Sunshine Colour Blast Shimmer Cube. Also I added a hand made sun and a gorgeous cloud embellishment from Charms Creations.


Here are some close ups - 


Here are some of the products used to complete these layouts -

Prima -Ink N Layer-Ink N Layer - Fragrant Flora-12 pcs

Colour Shimmer Cube - Sunshine


Colour Blast Shimmer Spray-- Lipstick


Thats it from me today, 

If you are looking to treat yourself, don't forget to have a look at our kit subscription options on the website, if you are already a subscriber to our wonderful kits stay tuned because the design team will be posting their takes on each of the kits through the month after each kit release....


We want you to know how to get the most out of each of your kits!!

hugs

Elisa xx

Saturday 5 August 2017

Lindy's Stamp Gang Colour Challenge Winner

Proud to display this badge on my blog!

A dream come true to win a challenge using these gorgeous products.

Thanks Lindy's!


'Favourite Place' by Elisa Ablett - Kraft Plus Challenge Blog

Hi Krafters!

Elisa here from the design team for Kraft Plus Challenge Blog with my latest layout based on the Challenge Board for August, the inspiration is trees, leaves and branches and better still perhaps a special tree in your life?

Here is the link to the Challenge.


Image may contain: text

This is the layout I created for the challenge. It is based upon a special place - a rainforest quite close to my hometown, you can go for hikes and even walk under a waterfall. This has to be one of my most favourite places, it is calming to walk among the beautiful rainforest and see all the foliage and animals. You just instantly relax walking in the cool temperatures in the rainforest and breathe in the fresh air....just an amazing place !


Here are some close ups!

Memory Maze Lasercut chipboard and stencils feature heavily on this page! along with fake moss, hessian and gorgeous Lindy's Sprays.


That's it from me today ! 
Head on over to the Kraft Plus Blog for more details on the latest challenge.

Hugs

Elisa xx


Friday 4 August 2017

Art Journal Page by Elisa Ablett for Artified

Hi everyone, 

Elisa here from the design team for Artified with my latest creation for the Artified blog- A mixed media Art Journal Page using the awesome products from the  NEW and exciting Mixed Media Kit - August Edition.

The kit is perfect for those wanting to try out new products and also to add to your mixed media stash!

No automatic alt text available.


The link to the Shop for the kit - Head on over to check it out!


August Watercolour Mixed Media Kit


Here is my project - The Art of Living.


Tutorial time 😀


Step 1 - Using the dictionary paper provided cut two feathers either by hand or using a template and also cut a few rectangles (about 5 or 6 ) depending on the size.


Step 2 - Using gesso from your stash, give your feathers and rectangles a coat and let dry


Step 3 - While your feathers are drying, lets start the background! Coat your page with gesso and let dry, then spray your page with the Gold Acrylic Marabu Spray and while wet add drips of colour onto your page from your watercolour palette (the greens, browns, oranges and yellows). With a very wet paintbrush grab your colour and add to the wet areas on the page. Using a heatgun dry and then keep applying colour til you are happy with the page.


Step 4 - Add colour to your feathers and rectangles by spraying each with water. Spray water onto a craft mat and add some of your colour to the water. Then using a paintbrush add colour to the wet area of your feathers and dry using heatgun.


Step 5 - Some paper weaving! cut thin strips about 10cm long and lay the first few on top of each other and then start weaving over and under, doesn't have to be neat. Then spray over the top with the gold Marabu Art Spray and let dry.


Step 6 - Add some stamping to your rectangles and background page using the stamp and an archival black inkpad and an acrylic block. 

Extra steps - Using the stencil and white modelling paste add texture to your background page
Cut a piece of white cardstock to stick your elements to the background page
Wrap some extra strips of the dictionary paper around a stick and add some ivory coloured cotton
Highlight some words from your dictionary or book paper - i was lucky enough to find the words - The Art of Living!
Stick down your rectangles, paper weaving, stick and feathers as shown in the main photo, overlapping each layer
Grab the thin paintbrush or water brush that comes with your kit and fill it with water, using the black colour add hand painted elements to your page, I added dandelions and grass.

I also used a dauber and a black inkpad through the stencil to add a butterfly to my page.

My theme was to tie in the words The Art of living with natural earth tones and flora and fauna.

Here are some close ups!


That's it from me today! I hope you have enjoyed my Art Journal page tutorial and also looking through the NEW Mixed Media Kit from Artified - Artified August Mixed Media Kit. Make sure you leave me some love!

Also make sure you join the new Artified facebook group to share your creations and keep up to date with all things Artified - https://www.facebook.com/groups/246759415835526/?ref=br_rs


'Frosty' by Elisa Ablett

  Hi Crafters, Elisa here from the design team for Ink Art Designs with the first of my 'Christmas in July' projects. For this proje...