Hi everyone,
Elisa here from the design team for Shop and Crop Scrapbooking back with a simple tutorial using the new Tim Holtz Distress Ink Oxides to make a mixed media layout using the leftovers from the August Crop Kit and a few things from my stash.
The Crop kit is chock full of amazing papers and embellishments and so far I have made 4 layouts out of it with leftovers !
If you are after Oxide inkpads or a Crop Kit order through
Kylie at the shop and use the code EA5 to receive a discount on me 😀😀
Kylie and I have come up with a special bundle deal for customers - Buy all 12 colours in series 1 and series 2 colour releases for a special price and receive an even further discount if you use the code EA5 just message Shop and Crop Scrapbooking for the details!!!
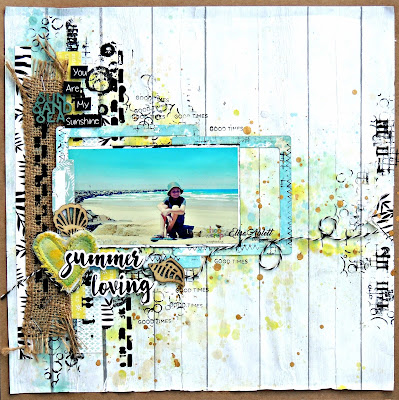
Here is my layout, a mixed media beach inspired layout.
Let's Get on with the tutorial!
I picked these lovely four beachy colours and grabbed my trusty water spray bottle to begin.
If you are unsure what the Oxide inkpads are and what makes them so crazy special, this is a description coming from Ranger and Tim Holtz -
"Tim Holtz Distress Oxide Ink Pads are water-reactive dye & pigment ink fusion that creates an oxidized effect when sprayed with water. Use with stamps, stencils, and direct to surface. Blend using Ink Blending Tools and Foam. Re-ink using Distress Oxide Reinkers"
Because they have pigment ink blended in with them they will stamp with a fine image, they are opaque so will show up perfectly on a dark surface, you can also layer the colours on top of each other and they still retain the colours and do not turn into brown smoosh. And the best thing is they still react with water like the Distress Ink pads.
I will be showing you a quick and simple tutorial on how to use these wonderful inkpads and how to apply them to a mixed media layout...
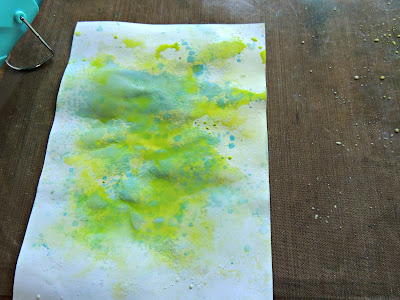
Step 1 - Grab your ink pad and smoosh it or wipe it onto your mat (special crafters mat that can be wiped over) spray the colour with water liberally to create large droplets
Step 2 - Turn a piece of mixed media cardstock over the colour on your sheet and place it on the colour. Now to get the droplets you can just pull the sheet back up without rubbing the back of the sheet with your hand or you can rub the back of the sheet to get a different look. Pull the sheet off the colour and dry with a heat gun.
Step 3 - While you are drying with your heatgun, grab a water spray bottle - the distress spray bottle is the best for this job as it releases rather large drops and spray onto your sheet over the colour and you will get this lovely oxidised droplet effect.
Step 4 - After your first layer of colour, you can now add layer after layer using the same technique!! you will get a multi colour effect with lovely droplets and crazy oxide effect.
Step 5 - At the end you can also add another technique using a fan brush. Smoosh your colour onto your mat, add the water and then using the brush instead, dip it into the colour and tap generous droplets of colour onto your page and dry with a heatgun.
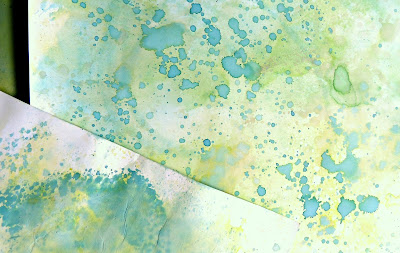
Below is a few examples of the end result of these techniques! perfect to use on a beach inspired layout ....right ??
Here is a few photos on how I incorporated these techniques on my layout.
Adding background colour to my page using the smooshing on the mat technique.
Adding some droplets of Antique Linen Oxide Ink pad to my page.
Use the inkpads to cover wood veneer or chipboard and use embellishments like DIY hearts from Charms Creations to mop up the colour on your mat and they will match your layout!!
I also used the technique on a couple of die cut square frames, which is a different and unique way of colouring and adding them to your page.
Add some stamping over your frames...
And here are some close ups of the finer details
Well that's it from me today, i hope you have enjoyed the tutorial and insight into how you can incorporate simple yet effective techniques into your layouts.
Hugs
Elisa xx


No comments:
Post a Comment
Thanks for visiting and commenting on our craft blog! 😄