Showing posts with label Art Journal. Show all posts

Wednesday, 4 December 2019

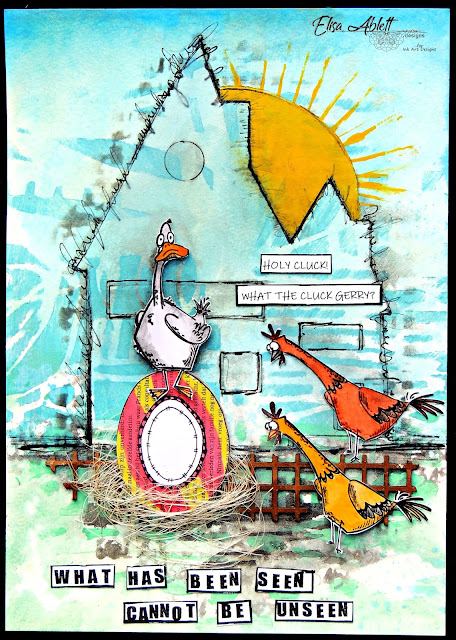
Holy Cluck by Elisa Ablett - Art Journal Page


Hi Crafters,

We are officially in December and I will admit to some slight panicking about not been ready for Christmas. 

So while I am heavy breathing into a paper bag in the corner, read on to see how this art journal page came together.

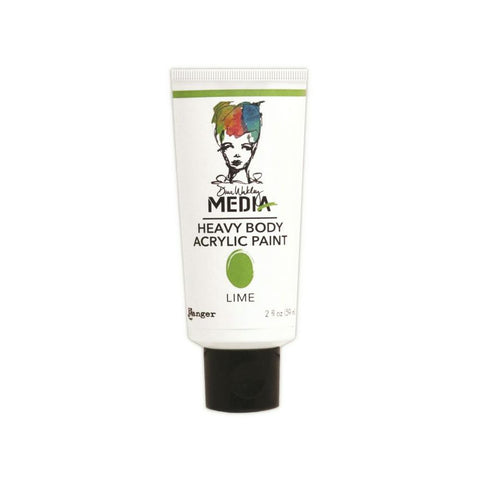
Let's take a look at the products used from Ink Art Designs:-


and a closer look at those gorgeous Katzelkraft stamps - I cannot get over the expressions on the faces of the animals, it makes for all sorts of projects if you have the right quote or saying..


I named my duck Gerry, i can see we are going to have some great adventures with him in my art journal pages lol.  To create my stamped images I used an archival ink in black and watercolours with a small round paintbrush. I stamped a few of each image and used different colours to get to the one i loved the most.


and my potty mouthed chickens, yet to be named, but I can see they will feature in future projects as well. 

I used a joggles house stencil in the background to look like a henhouse or a barn and kept to a lighter background with my paints to let the stamped images stand out. I also lightly stencilled over the top of the barn to add a bit of texture and depth. 

I am usually hesitant to make lumpy and bumpy art journal pages but I had the coconut fibre and thought it would be great for the nest under the egg and also chipboard piece which in a grid pattern looks at home in a farmyard setting.

Don't be shy in adding grungy marks like scribbly writing or lines etc, it all adds to the uniqueness of your pages.

Thanks for stopping by the blog today, make sure you leave me some love and don't forget to enter into this month's challenge over on the Ink Art Designs Facebook page. We love seeing all your creations..

Hugs 

Elisa x


Monday, 9 September 2019

'Bohemian' Art Journal Page by Elisa Ablett


Hi everyone,

Just sharing my latest Art Journal page for Ink Art Designs.

This is another page that I have completed in my mini Art Journal book that I posted about on the 24th August, inspired by the talented Tina Walker.

I haven't added a quote to this art journal page, it just felt 'enough' so I stopped!

Here is another look at the outside of the mini art journal books I made with the fabric covers.


and below is a close up of all the glorious texture from the recycled baby wipe, sari silk offcuts and vellum rose stickers that are in the background.

Let's take a look at the stamp I used from Ink Art Designs.....


 Image result for face up stamp rubber dance


Other items include:

Sari Silk, Vellum Stickers, Distress Oxide Inkpads, recycled baby wipe, Prima Confection Watercolours, Sigma Black Marker 0.7mm


After stamping her face on a separate piece of cardstock, I glued small strips and pieces of Sari Silk around her face and fashioned her hair, I added fine lines for her shoulders using a maker and then glued her baby wipe shirt on. I added her head piece 'crown of flowers' as it picked up the colours in her shirt and flowers and made her a true bohemian lady. Add small amounts of watercolour to the face, eyes and lips and shading under her chin etc.

Before I glued the Sari Silk down onto my page, I added my collage stickers and then added a thin wash of colour around and over the top to dull them down a bit. 

A scribbled border using a marker adds the last touches. 

Don't forget to visit the shop for more exciting Rubber Dance stamps !


Thanks for stopping by the blog today,

Make sure you leave me some love x

Elisa 

Wednesday, 19 July 2017

'The Blue Divide' Art Journal Page by Elisa Ablett

Hi Soul Sisters, 

Elisa here from the design team for Art and Soul Studio with my latest project which I based around this month's soulful project quote.

 the link to the facebook album is here for your entries - July Soulfull

there is a $75 voucher to the store up for grabs so get your entries in.

Image may contain: text


Here is my project, a very personal mixed media art journal page inspired by the quote and featuring products from Art and Soul Studio Store.

To me it symbolises the swirls of thoughts through our brains, the struggle between anxiety and panic and happy cheerful thoughts. How something so beautiful as your brain can be a little dented and scratched, so to speak .... 


Here is a close up of the thoughts, words cut from an old book.


I wanted to show you how I achieved my page using some of the materials from the store.


Step 1 - Using a new Mixed Media Journal from X-press It, it has beautiful 300gsm aqua paper! draw a face silhouette with a waterproof black marker, add a circle and line down your page where you want to showcase the line drawn between your thoughts in your head... (more symbolism)


Step 2 - Grab your desired colours of acrylic paint - I used Vicki Boutin Mixed Media Acrylic Paint available from the store on the link below. The colours are glorious! and it spreads like margarine.
Using a palette knife or silicone spatula spread the three colours inside the circle on your page and let dry.


Mixed Media Acrylic Paint 1.7oz 4/Pkg: SET 2


Step 3 - Using an old sheet of music paper and a sheet of patterned paper (Abstract Art by Kaisercraft - Basecoast 4 collection) tear small strips of the papers and use to build the silhoutte's clothing on the lower half of the page plus also part of the background on the right.


I also used the patterned paper and using a new bohemian flower die from the store, I diecut my flowers and put them aside for later.

Cherry Lynn Designs - Mehndi Botanicals 4


Step 4 - Using a paint brush add a small wash of gesso over the top of your patterned and glued paper to dull the colours a little. Then grab your favourite watercolour inks and spray bottle and a paintbrush add colour to your silhoutte page on the right side. I used the FABULOUS ecoline inks available in store individually or in packs of 6 or 10 colours. - 

Ecoline Liquid Watercolour: SET OF 10


Step 5 - Use a large paintbrush and water as well to add a wash affect over the top of your inks.


Last steps - Once your page has dried and you have added all the colour inks you want, using a versafine inkpad which is archival, stamp around your circle and line to create depth on your page. 

Also add your title, either handwrite or use stamps as I have using the same black versafine inkpad.


To finish - add your die cut flowers, eyes that i ripped from a magazine and some important words from an old book to represent the war our brain sometimes has when we are anxious, sad and confused and stressed.


Add some finishing touches like colour to the lips or outline your flowers to give them more depth.

And you are finished!!

Hope you have enjoyed my project and the tutorial, the quote immediately 'spoke' to me and I wanted to create a page that symbolised the real struggle that a lot of people go through with the warring thoughts in their minds. Art is Therapy.....

Make sure you leave me some love and head on over to the store to check out the amazing products the store is stocking to help you on your artistic journey...

Elisa xx


Wednesday, 12 April 2017

' My Sanity ' by Elisa Ablett

Hi everyone,

Just sharing a recent fun Art Journal page of mine that featured on the Artified Blog.

----------
My turn up on the Artified Blog with a fun and colourful (tongue in cheek) Art Journal page.

Featuring loads of awesome Artified goodies including Tim Holtz layering stencils, distress paints, prima watercolour confection pans and a gorgeous Stampotique unicorn stamp.


Here are just some of the wonderful products used to create my Art Journal page, follow on for the step by step tutorial.


Step 1 - Using Dina Wakely heavy body white paint paint/glue old book paper and medical gauze to your page to add texture and depth.


Step 2 - while you are waiting on your page to dry, stamp your unicorn onto smooth watercolour paper with archival ink and colour with your prima watercolours using a paint brush. Fussy cut your unicorn out. I also drew a couple of bears to ride the unicorn in keeping with my funny saying and coloured them as well. 


Step 3 - Add some more texture to your page with modelling paste and your Tim Holtz Layering stencils. 


Step 4 - Once your paste has dried, using the side of a ruler ( i added black indian ink to the side of the ruler) and spritz my page with water in the middle, then pressed my ruler to the page to create black lines 


Step 5 - Add some circles to your page using stamps, toilet rolls, plastic lids etc and ink, start colouring the larger circles with watercolours or distress paint. Then start colouring your page using distress paint and water colours spritzing with water when needed.


Step 6 - Add some visual interest by gluing some colourful strips of paper. and then using a baby wipe over the top of a stencil to take away colour from your page.

Another chance to add some stamping !


Step 7 - Last steps - Add a large grungy circle in the middle of your page with a ink nib pen and Indian ink so that your unicorn can sit inside it and you can add your quote around the circle. 


Here are some close ups !!


Here are some links to the products in the Artified Store:


Unicorn by Magda Polakow


Well that's it from me today!!

Hope you have enjoyed seeing my Art Journal come together :-) 


Elisa xx


Thursday, 24 November 2016

Make each day your Masterpiece by Elisa Ablett

Hi Crafters,

Elisa here from the Design Team for Memory Maze Lasercuts with my next share for this month.

I found inspiration for my project in a oil painting that I saw on the internet and loved the colours so much i decided to replicate them. Plus it gave me a chance to crack open my new set of Prima Confections Watercolour Pans, the colour in these little watercolour sets are amazing!

Here is my double Art Journal Page that I created with the theme of making each day your Masterpiece. Monday through to Sunday. Featuring Memory Maze 12 x12 sheet of chipboard Trees and Memory Maze Stencils (Micro Dots and Crackle) which can be found here at the -


Here is a list of the other products used in my project:

Prima Confections Tropicals, Dylusions Paints, Colour Blast Australia Pastes in Rose Petal and Bling, Colour Blast Shimmer Spray in Bling, Gesso, Dorlands Wax Medium, Art Foamies Stamp (writers block), Carabelle Stamp and Kaisercraft Stamp.


Here are some close ups of the pages, for the finer details. 

TIP - I painted the trees with Black Dylusions Paint then while wet press face first down into the reflection of the sunrise making the trees have a mirror image.


12 x 12 just trees,trees,trees, 300 x 300mm


Crackles Stencil 150 x 200

Mini Stencils  micro dots   100 x 100mm  min buy 5 priced as eac


Thank you for stopping by the Blog today. Make sure you leave some love 😀😀

'Frosty' by Elisa Ablett

  Hi Crafters, Elisa here from the design team for Ink Art Designs with the first of my 'Christmas in July' projects. For this proje...