Showing posts with label Watercolours. Show all posts

Friday, 12 June 2020

Me ? Crazy ? - Art Journal page by Elisa - Ink Art Design Team


Hi Stampers,

Elisa here from the design team for Ink Art Designs with my latest creation, a fun art journal page.

What do you get when you cross a snarky frog with a unicorn and loads of colour? lol

To start my page I added Watercolour Inks to watercolour paper using a wet on wet technique and blotting with a baby wipes to take away some of the bright colour. I saved my baby wipe and waited for it to dry, I then peeled the layers of the baby wipe apart and fussycut cloud shapes from one of the thinner layers. 

Add your book paper and sew in bright coloured thread around the paper.  Add a black border in a watercolour black pencil. Adhere your clouds to the page and add your stamped and coloured images. I decided to add a stencilled border to really make the colours pop!

Here are some of the products used from Ink Art Designs shop:


See the source image


Thanks for stopping by the blog today, make sure you stop by the Ink Art Designs Stamping Playground on Facebook!

Hugs 

Elisa x


Friday, 16 August 2019

See what others don't ||| by Elisa Ablett


Hi everyone, 

Elisa here with my first project for August for Ink Art Designs, a spring inspired art journal page!

It features a very bright background along with colourful flowers which have been stamped from a gorgeous Stamp set from That's Crafty, so put on some sunglasses and let's pretend Spring has arrived early in Australia πŸ˜‰πŸ˜ 

The background and flowers were all created from Colour Blast water colour liquid inks on normal everyday 4 x 6 inch photo paper and then stamped and fussy cut out. Yes you heard right, photo paper and watercolours can produce the most spectacular results and each print is different!

I wanted to create a 3d garden in my Art Journal so I added some hand painted stems and buds to go on the background before the flowers and leaves were stuck down. 

Let's take a look at the products used to create this art journal page - 

Ink Art Designs Shop


and some close ups of the finer details!


You can see how vibrant the watercolours on photo paper can be and you can get some wonderful patterns and hues to stamp on and cut out. 

That's it from me today, I hope you head over to have a look at Ink Art Designs great range of stamps and products and make sure you stop by the facebook group to participate in the monthly challenge!


Hugs

Elisa 
xx


Friday, 24 March 2017

'Fun in the Summer' by Elisa Ablett

Hi everyone,

Elisa here from the design team for Memory Maze with my project for today, a colourful fun beachy layout.

To start my layout I drew a few circles using my waterproof markers in black by tracing around the outside of round containers from around my kitchen, you could use lids of plastic containers or plates etc. Then I used my Prima Watercolour Confection pans to create three large watercolour circles for my background. 

Then using a gorgeous sea themed stencil from Memory maze, I used my black markers again to trace around the insides of the stencil creating turtles and bubbles and shells for my background as well.

Add some stamping...and then gesso your chipboard pieces (let dry) then colour using your watercolours or you could use colour markers or distress crayons.

Here is the link to the Memory Maze Store - http://www.memorymaze.com/ to view all the products used in this layout.


Here are some close ups  - 


Memory Maze Products used to create this layout - 


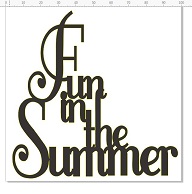
Fun in the summer 100 x 100  pack of 5 individually packaged PRI

Turtle,turtles , Individual small


That's it from me , thanks for stopping by the blog today :-) 

Elisa xx


Sunday, 5 February 2017

'Chase your Dreams' by Elisa Ablett

Hi Crafters,
My turn up on the Shop and Crop blog today with my take on the February Tic Tac Toe challenge for Shop and Crop Scrapbooking Store.

Here is the challenge if you haven't caught it so far! 


Tic Tack Toe

Pick a Line and Create ; can be vertical, horizontal or diagonal has to include items in the line (you can include other things on your layout but we must be able to see the line you picked).
Please note this isnt a colour challenge !

Click here to visit the Inspiration Group on Facebook - this is where you load your challenge entry into the February Album.

πŸ‘‡πŸ‘‡πŸ‘‡πŸ‘‡πŸ‘‡πŸ‘‡πŸ‘‡

NOW FOR MY DESIGN TEAM TAKE ON THE CHALLENGE

 I chose the bottom line of the challenge, Watercolours, Doilies and Stencils.

I chose to complete a Mixed Media Tag using Lindy's sprays and magicals as my watercolours, a handmade doily using modelling paste (oh yes I did!) and a Dusty Attic Stencil with modelling paste. If I get enough interest I will do a tutorial making modelling paste embellies, so let me know in the comments or contact Kylie if you would like to see it happen :-)


 Materials used from Shop and Crop Scrapbooking -

Lindy's Stamp Gang Magicals - Yellow Rose of Texas

Lindy's Stamp Gang - Magical Set-Prairie Wildflowers


Lindy's Stamp Gang Fabio Flat Spray - Danny Zukos Denim


DANNY ZUKO'S DENIM - Fabio Flat Spray

From my stash - 
Modelling Paste, Gesso, Dusty Attic Stencil, Stamps, Versafine Ink

And introducing a couple of RAW Mixed Media Tags from Memory Maze Chipboard that I helped design, which is super exciting! 

These tags are heavy weight chipboard with custom made 'fancy tops' and they will withstand copious amounts of mediums. Perfect fancy ATC's or just mixed media tags. 

Here they are in their RAW state, ready for artsy fartsy stuff and things 😝

Plenty more designs available with more on the way. If you want to get your hands on these beauties, contact Kylie at Shop and Crop for a special customer order.


That's it from me today, 

If you haven't already, make sure you have a go at this month's challenge, pick a line, complete your layout and head over to the facebook page and link it up! 

Also don't forget there is a Design Team Callout for Shop and Crop at the moment as well.

Hugs

Elisa xx

Sunday, 8 January 2017

You are Capable of Amazing Things By Elisa Ablett

Hi Crafters,

My turn up on the Colour Blast blog today with a bright and vibrant yet grungy boy mixed media layout.

Sometimes when you pick up a photo and you realllly want to scrap it but the colours seem to bright and all over the place and perhaps you have a bold pattern or some distraction in the photo. I used to stress about it, perhaps i'd even print it in black and white to help myself out BUT I made the decision that with mixed media you can use those bright colours and bold patterns in your photo to create the perfect background to match....so that's how I'm rolling these days.

With the photo that I used you can see the bold green and yellow graffiti in the background plus not to mention his bright Carribean blue shirt so those are the colours i decided to concentrate on..plus a bit of black to grunge it up in honour of the graffiti feel to the layout.

Here is the finished layout.


Here are some close ups so you can see the details a bit better.


Let's get started on the tutorial!


Step 1 - Draw a rectangular frame in the centre of your page with a black waterproof marker, then go over the top of the black frame with a masking fluid pen or fine applicator. Masking fluid is a fantastic tool to add to your Mixed Media creations, you can block colours with it very easily..


Step 2 - Add a small amount of Colour Shimmer Dust in Paris and Lush to a paint palette tray and then add a small amount of water. Using a spray bottle of water and a paint brush add colour to your blocked area. I sprayed the area first with water and then added splashes of colour here and there, I also added after it had dried, a bit of Sunshine Colour Shimmer Spray by dipping a clean paint brush into the spray bottle and dripping it onto the coloured area.


Step 3 - after the coloured area has dried completely, you can remove the masking fluid barrier simply by rubbing it with your finger and lifting it up and off. I then used a lovely circle stencil and traced the lines and the circle over the top of the coloured area.


Step 4 - Add some Dusty Charcoal Colour Paste with a palette knife and stencil in places over your layout.


Step 5 - Grab your selected  Colour Sprays and Colour Shimmer Sprays and spray your selected embellishments, I have used an old set of Resist chipboard stars that come packaged plain and then you colour them yourself...


Step 6 - Add some more Colour Blast Paste in Sunshine


Step 7 - Add some grungy stamping with a black versafine ink pad after the Sunshine Paste has completely dried. Then add another laying of stenciling using Colour Paste in Apple of My Eye.
Dry thoroughly and then add your last touches to the layout.

A few extra details at the end to put your layout together:

1. spray water at the top edge and add a few drops of Carribean Colour Spray and spray water over the top of the colour and let drip down into the middle of your page, only a small amount, once dry do the same to the bottom edge.
Colour Sprays - Carribean

2. Add some more grungy stamping using a black archival ink pad
3. Add some black splatters using Roadbase Colour Spray.
Colour Sprays - Roadbase

4. Glue your photo and background papers down with a little bit of black cotton underneath them
5. Add your title and coloured stars and Heart embellishment. Glue them down.

You are now finished, woohoo! 

Hope you have enjoyed this tutorial.

Thanks for stopping by the blog today, make sure you leave some love ...


Elisa xx


Thursday, 1 December 2016

Bush to Beach (collage mixed media) by Elisa Ablett

Hi Kraft Lovers,

Elisa here from the design team for Kraft Plus Challenges.

It's the start of a new month and therefore a NEW exciting challenge!

This month it's all about KRAFT and 'home sweet home'

Click on the link below and check out the challenge and the design teams inspiring creations.


This is my design team layout !

A collage mixed media layout featuring hand painted water colour paintings, stamping, stencilling, painted chipboard, gum leaves and gum nuts and shells.

I was inspired by my home town and my home which is nestled between gorgeous mountains and the sea on the coast of Australia. 

My husband and I grew up one valley apart from each other on banana plantations (our parents were farmers and friends) so after school and many years we managed to meet again and fell in love and we made our home not far from where we grew up.

I have lived on many farms in the bush and also lucky enough to live for some time on top of a beautiful mountain overlooking the Pacific Ocean especially an island which has a historical lighthouse and light keepers cottages.

My layout is inspired from many things including the places i have lived to the views I have seen from my home, to meeting my husband and where we live today. So you could say my layout is a collage of a few of the most important places and times in my life.


Here are some close ups of my layout -


Some stencilling!!


Some stamping and colouring using Prima Watercolours :-) 


This month over at Kraft Plus is bittersweet, a few of our lovely team members are saying goodbye to the team, they will be sadly missed as part of our Kraft Plus family....


That's it for me today...

Thanks for stopping by the blog, make sure you leave some love...


'Frosty' by Elisa Ablett

  Hi Crafters, Elisa here from the design team for Ink Art Designs with the first of my 'Christmas in July' projects. For this proje...