Saturday, 31 December 2016

Awesome by Elisa Ablett

Hi Crafters,

Elisa here from the design team for Shop and Crop Scrapbooking with a last minute, after Christmas, oh heck i'm running late blog post!! You know what i'm talking about 😉😉

I wanted to share with you the awesome Boy paper collection pack from Simple Stories called 'So Rad'. It is filled to the brim with papers, element pieces, stickers and bonus transparency overlays.

Available now from Shop and Crop Scrapbooking, if you use the code EA5 you can get a discount on your next online shop!!

Here is one of the layouts I have created with just a few elements of this pack with loads of left overs!

I will be back in the New Year with another layout featuring this awesome boy collection, not just for the younger males in our lives but also excellent for the teenagers as well with gaming and sports elements. Happy New Years everyone.


Here are some close ups of the details of the elements from the paper collection pack. I chose the number photo transparency and cut it up and stapled it too my page for a great feature. Plus a touch of mixed media with some splatters of Colour Blast.


Here are some of the products used and available from Shop and Crop Scrapbooking.

Image result for simple stories so rad collection


Coredinations - 12x12, 10 sheet white, smooth 110lb. - Basics


Thanks for stopping by the blog today xx


Cool Dude by Elisa Ablett

Hi Crafters,


Just sharing a layout and full step by step photo tutorial I created for Colour Blast Blog back in early December !!

I wanted to create a grungy boy layout so I grabbed a few of my fav Colour Blast products -  Paris Shimmer Dust, Roadbase Colour Spray and Dusty Charcoal Texture Paste which can be found at the Colour Blast Shop.

Here is the layout - loads of gorgeous greens (including some neon green paint) and black.

Green and any shade of green is my youngest son's favourite colour, so this is his favourite layout so far... I wanted to show his more fun, crazy side in this layout, he has a huge sense of humour and is beyond his years with what he says and does. Everyone describes him as being a real character and I wanted to capture it before he gets to that stage of pre-teen or teenager where they just eat and grunt at you lol


Let's get started on the tutorial !


Step 1 - Grab a ruler and pencil and draw a line about a third of the way down your page starting on the left side.


Step 2 - Spray the line with water, then while wet grab the top of your Roadbase Colour Spray and drag colour along the line through the water. Do this a few times, stopping to drop large drops of the colour into some of the more wet areas.


Step 3 - While your black colour is still wet, grab your Paris Shimmer Dust and using the end of a pencil or paint brush add some of the Dust Crystals to the wet areas as shown in the photo, if you need to add more water, spray some more directly onto the end of the paintbrush where the Dust is, it will create some great patterns and colours.


Step 4 - Using a black marker and brick stencil, trace around the inside of the stencil along the bottom edge of your paper and also in the top left hand side of your paper.


Step 5 - Using black archival ink and a large background stamp, I used a great Carabelle Studios stamp, add some light stamping to your brick work but really ink the stamp up for your background stamp for behind your photo.


Step 6 - Using a large square item (like a tupperware lid etc) using your black marker again trace around the edges of the square item to create a great background frame for your photo layering.

Also using the brick stencil again and a palette knife, spread some Dusty Charcoal Texture Paste over the area where your photo will sit. DRY thoroughly.


Step 7 - Add some more Dusty Charcoal paste using your palette knife and a skull and cross bone stencil (I used a Tim Holtz stencil) on the top and bottom right hand side of your paper. Also splatter and drip Apple of My Eye Shimmer Spray over the areas in which you applied your texture paste.
DRY


Step 8 - Once Dry, add some more stamping, arrows, chevrons, grungy grid stamps those sort of stamps. I also used a great roller stamp that had a few phrases on it like crazy fun, fearless etc I added those words mostly around the skull and cross bones areas.


Step 9 - At this stage I scraped some gorgeous neon green paint using a palette knife in patches over my layout. I also added to clear phrase stickers near the skull and cross bones. I did a practice run of where I wanted my photo to go along with some extra embellishments. It was at this stage I wanted to add some more Paris Shimmer Dust in patches to bring the beautiful green out some more!!


Some final details!!

Add some black shimmer splatters using your Dusty Charcoal Shimmer Spray.
Add some great black and white cross paper under your black tags and under your photo (i fussy cut my photo out).
Add some black thread under the black tags to add some more texture.
Add the rest of your embellishments.

Here are some close ups!


Here is another look at the final layout.


That's it from me today, I hope you have enjoyed the tutorial, don't forget to leave some love...

Wish me luck in finishing off the Christmas shopping lol

Elisa xx


Thursday, 1 December 2016

Bush to Beach (collage mixed media) by Elisa Ablett

Hi Kraft Lovers,

Elisa here from the design team for Kraft Plus Challenges.

It's the start of a new month and therefore a NEW exciting challenge!

This month it's all about KRAFT and 'home sweet home'

Click on the link below and check out the challenge and the design teams inspiring creations.


This is my design team layout !

A collage mixed media layout featuring hand painted water colour paintings, stamping, stencilling, painted chipboard, gum leaves and gum nuts and shells.

I was inspired by my home town and my home which is nestled between gorgeous mountains and the sea on the coast of Australia. 

My husband and I grew up one valley apart from each other on banana plantations (our parents were farmers and friends) so after school and many years we managed to meet again and fell in love and we made our home not far from where we grew up.

I have lived on many farms in the bush and also lucky enough to live for some time on top of a beautiful mountain overlooking the Pacific Ocean especially an island which has a historical lighthouse and light keepers cottages.

My layout is inspired from many things including the places i have lived to the views I have seen from my home, to meeting my husband and where we live today. So you could say my layout is a collage of a few of the most important places and times in my life.


Here are some close ups of my layout -


Some stencilling!!


Some stamping and colouring using Prima Watercolours :-) 


This month over at Kraft Plus is bittersweet, a few of our lovely team members are saying goodbye to the team, they will be sadly missed as part of our Kraft Plus family....


That's it for me today...

Thanks for stopping by the blog, make sure you leave some love...


Sunday, 27 November 2016

Mixed Media "Dream Catcher" by Elisa Ablett

Happy Sunday Crafters!

It's Elisa from the design team for Colour Blast Australia again with a little something different today...

A dream catcher kit happened to fall into my trolley at one of my local shops a while back and I decided to save it with my credit card (just doing my bit to save all craft supplies) and I have been saving it until inspiration struck.

Here is my finished 'Sea themed' Dream Catcher featuring some awesome shells that my youngest son collected at our local beach.

Features the following Colour Blast products - Colour Mica Powder in Espresso and PolarColour Shimmer Spray in Just Blue and EnvyColour Shimmer Dusts in Peacock, Cobalt and Duke

Click on the links to see each of the gorgeous mixed media supplies!!


Let's have a closer look at how I transformed this kid's Dream Catcher kit !


Here are the pieces of the kit, I kept the paper cut out pieces for another project and just used the bare dream catcher.


First step - Paint or spray gesso over your pieces - front and back

Second step - I mixed an amount of Espresso Mica Powder with Gel Medium (about 1/2tsp mica to 1 1/2 tsp of gel medium) in a paint palette and using a palette knife and fingers smooth the medium over two of the mdf feathers and the frames of the dream catcher (dry each side thoroughly before turning over and completing the other sides) before turning over see Step 3 this step has to be done prior to each side drying.


Step 3 - Using a texture stamp or a piece of rubber matting (repurposed placemat) while your gel medium is wet - press your texture piece into the medium leaving a wonderful pattern in the gel medium. DRY before turning over. see below photo


Next step - mix a smaller amount of the Polar mica powder with Gel Medium  and once mixed spread with your finger over the dry frames of the catcher so the gorgeous teal colour goes into all the grooves of the pattern you made in Step 3. Also using a palette knife and also your finger smooth the rest of the polar mica mixture over the remaining mdf feathers. (same deal here, dry before turning over) 

TIP - use toothpicks through the premade holes on the frames so that you don't fill the holes up with your gel medium mixture. You could also balance your circle frames with toothpicks and work on both sides at once.


Next step - while you are waiting for your frames to dry we will move onto the feathers, grab three white feathers, mix up a very small amount of each of your chosen Colour Shimmer Dusts with water in a paint palette and using a paint brush, add colour to your white feathers. Once dry I also used a Sepia Inkpad to ink the bottom of the feathers and add a touch of the brown to the feathers. Put aside to dry and back to the Frame.


Next step - Spray and splatter your frames with a combination of Colour Shimmer Sprays, I used Just Blue and Envy.


Next step - After your frames are dry, it is now time to thread them with the heavy hessian twine that came with the kit. Tie off the top and then thread through the holes as pictured above in a clockwise direction. Once you have finished the first go around the frame, you then do the same threading in the middle of the first loops that you have made. 


Keep threading around and around (loosely) inside the frame until you reach the middle, then pull the threads tight! this will pull your threads together and then you can tie them off in the middle. I made the decision to tie a few shells in the middle as a feature.


Once I threaded the top frame and attached the bottom circle with twine, I completed the following quick steps.

- Thread blue thread around the first lot of loops on the main frame.
- attach teal and blue coloured thread to your painted feathers, mdf feathers and shells
- distress the coloured twine a little to give them a coarser look
- Glue a couple of shells on the main frame
- Using a sepia inkpad and dauber or your finger brush a little bit of brown ink onto your feathers to colour coordinate them with your frames.

Tie your thread to your pieces first, then tie them onto your frames, you can adjust the length of each drop them a lot easier.

Here are some close ups !!


and the finished product again! 

Either a lovely home decor piece or a cool hand made gift.


That's it from me today! I hope you have enjoyed the tutorial and it prompts you to go 'save' some of your own craft supplies in your trolleys. 😉😉😉😉😉

Elisa xx


Thursday, 24 November 2016

Make each day your Masterpiece by Elisa Ablett

Hi Crafters,

Elisa here from the Design Team for Memory Maze Lasercuts with my next share for this month.

I found inspiration for my project in a oil painting that I saw on the internet and loved the colours so much i decided to replicate them. Plus it gave me a chance to crack open my new set of Prima Confections Watercolour Pans, the colour in these little watercolour sets are amazing!

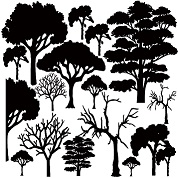
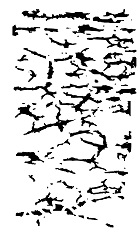
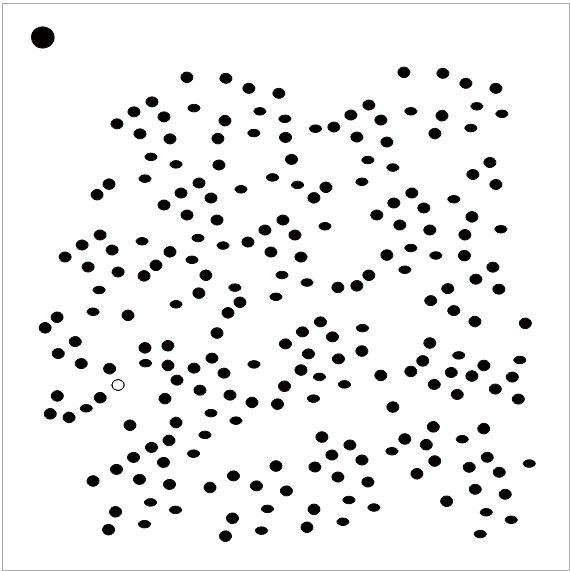
Here is my double Art Journal Page that I created with the theme of making each day your Masterpiece. Monday through to Sunday. Featuring Memory Maze 12 x12 sheet of chipboard Trees and Memory Maze Stencils (Micro Dots and Crackle) which can be found here at the -


Here is a list of the other products used in my project:

Prima Confections Tropicals, Dylusions Paints, Colour Blast Australia Pastes in Rose Petal and Bling, Colour Blast Shimmer Spray in Bling, Gesso, Dorlands Wax Medium, Art Foamies Stamp (writers block), Carabelle Stamp and Kaisercraft Stamp.


Here are some close ups of the pages, for the finer details. 

TIP - I painted the trees with Black Dylusions Paint then while wet press face first down into the reflection of the sunrise making the trees have a mirror image.


12 x 12 just trees,trees,trees, 300 x 300mm


Crackles Stencil 150 x 200

Mini Stencils  micro dots   100 x 100mm  min buy 5 priced as eac


Thank you for stopping by the Blog today. Make sure you leave some love 😀😀

'Frosty' by Elisa Ablett

  Hi Crafters, Elisa here from the design team for Ink Art Designs with the first of my 'Christmas in July' projects. For this proje...