Sunday, 2 July 2017

'Star' by Elisa Ablett

Hi Soul Sisters,

Hi I am up on the Art and Soul Blog today with a mixed media scrapbooking page.

Art and Soul Studio is now branching out to stock scrapbooking and papercraft products and what better way to showcase the new ranges in store for those who enjoy scrapbooking and especially mixed media scrapbooking then a mixed media tutorial. This tutorial is not only for those who scrapbook, you can use the techniques shown for Art Journalling or Artist's Trading Cards or even on canvases. You are only limited by your imagination!

Here is my layout


Here is the collection I used from Art and Soul Studio - 7 Dots Studio - Hazy Days Collection and I also used stamps from Carabelle Studios


Tutorial Time!


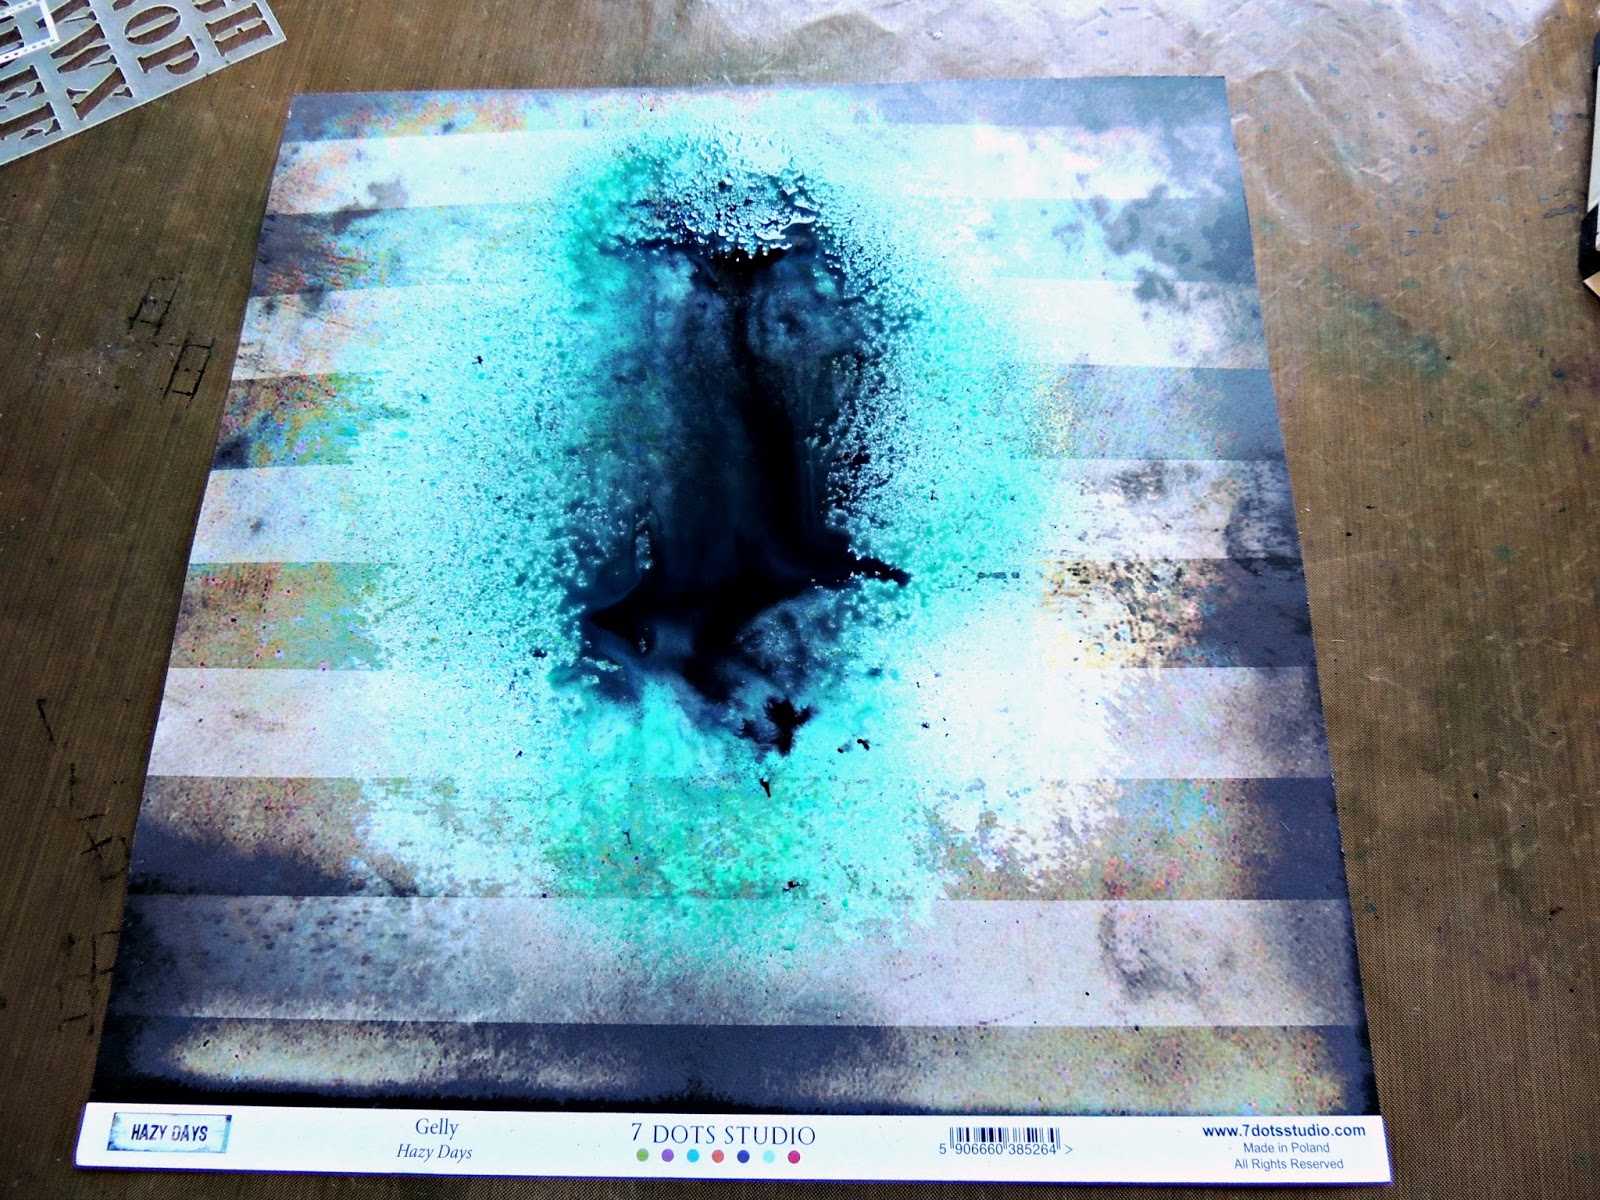
Step 1 - Using the 'Gelly' Hazy Days paper, grab your Marabu Art Sprays and carefully aiming at the centre of the paper, spray your turquoise colour in an oval shape. Then spray your black colour in the centre of the paper while wet, this will let the black merge with the turquoise to create a merging pattern. 


Step 2 - Using an alpha stencil and the lovely bright yellow Marabu Art Spray, hold the stencil slightly above the paper and spray around the oval colour area on your paper through the stencil.


Step 3 - Add some black splatters to your background using your black spray. I take the spray lid off and tapping my finger on the tube over the page.


Step 4 - Make sure your page is completely dry then its time for stamping. Using an Archival safe black stamp pad for example a Versafine or Staz On and your stamp on an acrylic block, ink your stamp. Then stamp in the centre of your page as pictured.


Step 5 - Add some different stamping to the centre of your page and also to the left and right side of your page.


Step 6 - Add some splatters of the Turquoise and Black ink to your page by taking the lids off and tapping the ink onto the page.


Step 7 - Using the Alpha Drips Stencil and TCW Black Modeling Paste and palette knife, add some texture to your page to continue with the grungy look 


Step 8 - Add some of the coordinating stickers to your page and paint the coordinating chipboard with black gesso or paint and let dry. 

Also using a Kaisercraft Decorative Die - Texture Woven as pictured below - die cut two of the texture pieces out of black cardstock and put them aside.


Step 9 - Stick your elements down onto your page including the chipboard and die cut pieces. I use Helmars Acid Free Glue


Step 10 - Glue black cotton thread over the top of your texture pieces in a messy heap!


Last steps - A great technique and cheater's way of adding foiling to your page or chipboard is to use a glue stick and a paintbrush! Wait until your chipboard is dry and then using the glue stick, add glue to the top of the chosen chipboard pieces - I used the stars and the title piece.

Then using tweezers or just your fingers add some gold foil flakes over the top of the glue areas on your chipboard. Let dry completely.


Finish off by using a stiff paintbrush - brush over the top of the chipboard quite roughly to brush away the foil that is not glued down, this will result in a distressed foil effect.


Mat your photo with a 5mm edge in a piece of white cardstock then re-mat the photo in a piece of 7 Dots Collection - Hazy Days - Slick paper.

7 Dots Studio - Hazy Days - Slick

Arrange your remaining elements on the paper and glue down.

Here are some close ups of the finer details - 


Products


Well that's it from me today! Hope you have enjoyed the tutorial, make sure you leave me some love.

Elisa xx


Sunday, 18 June 2017

D-lish June Cybercrop Challenge - 'Heavy Metal' by Elisa Ablett

Hi everyone,

Just sharing my challenge for the June Cybercrop for D-lish Scraps! 

My challenge is - Heavy Metal


{JUNE CYBERCROP CHALLENGES }

Challenges close Friday 14th July at midday. Enter in individual albums, links below:

Challenge #1 by Jasmine - https://www.facebook.com/media/set/…
Challenge #2 by Anthea - https://www.facebook.com/media/set/…

Challenge #3 by Elisa - https://www.facebook.com/media/set/…

Challenge #4 by Amanda - https://www.facebook.com/media/set/…


Here are some close ups of the finer details. Some of the metal parts of the layout include metallic paint, gold foiling on the stars, gold washi tape, gold flecked black backing paper, metal punchella, gold letters, glitter border diecut, flair, staples....be inventive with your metal embellishments.


Here are all four of the challenges for the June Cybercrop challenge the links to the albums are at the top of this post.


Image may contain: 2 people, people smiling

Here is the June Cybercrop Prize!


Thanks for stopping by the blog today 😀


Hugs xx

Elisa 


'Enjoy the Little Things' by Elisa Ablett

Hi everyone,

Just sharing my latest layout and blog post for D-lish Scraps.

I just loved the new Kinder Kreations chipboard feathers and the new numbers stencil and wanted to incorporate both on my project, I have also rediscovered a foiling dip dye technique to use on my feathers.

TIP - Try an unusual combination of colours on your layout, teal, raspberry, kraft and black and white go together beautifully....with a splash of yellow gold!


Here are some close ups of the finer details! To achieve the foiled dip dye look on your feathers, I inked the bottom half of my feathers with black ink. Then i used a bostik glue stick and rubbed glue on the bottom half of the feather, then I pressed gold flakes onto the glue, I then gently heated with my heat gun or let dry naturally. Then once dry using a stiff brush - brush away the gold foil gently. It will leave the foil distressed and patchy on your feathers. I also added some wire around the tips of the feathers to add to the grunge!


Also on this layout I added a few pieces from a past 'Just Add Paper Kit'  - A black and white bag and paperclip along with some co-ordinating washi tape.


To make a statement on your page, add a splash of bright coloured paint and stencil in black over the top! D-lish Scraps store is stocked full of amazing 5x5 stencils in different designs.


Well that's it from me today, thanks for visiting the blog, make sure you leave some love xx

Elisa 


Thursday, 15 June 2017

'Soar' by Elisa Ablett - Rubber Dance June Challenge


Hi everyone, 

Just popping in to share a challenge project I created for the June Challenge at Rubber Dance Blog, Summer Theme Challenge.

I love these stamps! and I am slowly collecting them bit by bit :-) 

My mixed media tag features the Hummingbird Rubber Dance stamp and handmade coloured baby wipe flowers with touches of gold foiling. The background is created using the following mixed media products - gesso, distress ink - mermaid lagoon, cracked pistachio, Irresistable inks and Ken Oliver Gold Colour Burst Liquid.

I hand made the flowers and leaves using die cuts glued and fussy cut from a hand coloured baby wipe which had been dried. I then added gold foil touches to the leaves and the bird's wings. My tag reminds me of the birds and colours of summer in the area in which I live, the blue of the ocean, the green of the foliage and trees and the beautiful honey eating birds and flowers that come to stop in the garden.


Here are some close ups of the gorgeous stamp!


Here are the details of the challenge over at the Rubber Dance Blog.


Why don't you head on over to the Rubber Dance Blog to have a look at the June Challenges and the amazing design team inspiration.

Thanks for stopping by the blog today, make sure you leave some love ....

Hugs 

Elisa xx


Saturday, 3 June 2017

'So Cute' By Elisa Ablett

Hi D-lish lovers 💓 

Its the weekend woohoo! Now who is getting some crafting time in ??

Image result for weekend crafting memes

I'm up on the blog today with my latest layout, a colourful mixed media layout featuring the new Butterfly cut files from the D-lish Scraps Shop.

The background was created using the latest 'Shakers' from Lindy's Stamp Gang, I just sprayed water onto my layout and tapped out the coloured powder from the pots and they just spread out over the wet area in the most glorious pattern. Once dry I added some stamping and gold paste through a Pattern-Quartet Stencil. I added some glitter to the gold paste when it was still wet and it dried perfectly within the paste.

Make sure you stop by the shop to check out the specials in the Past Kits Bits 50 %-OFF section, a few great bargains, I picked up the gorgeous pink and teal heart wooden button from there for under a $1!!


Here are some close ups of the finer details - you can see how I added some colour to the inside of the Butterly Creative-Cuts and twirled some gorgeous pink Coloured-Wire around from the top of the page to the bottom.


In the photo above you can see I cut 'So Cute' saying from a sheet of the Teal Ombre Wordfetti - Journal Its. They are one of my favourite D-lish Scraps products, perfect for adding a subtle and colour co-ordinating title to your page! and yes I think you can tell my favourite colour is Teal I have used it in almost all of my layouts so far.

You can also see the glitter sparkling in the Gold Paste through that versatile quartet stencil.


Thanks for stopping by the blog today! make sure you leave some love xx


Friday, 2 June 2017

'Just 2 Cool' by Elisa Ablett - Kraft Plus June Challenge

Hi Everyone, 

Its that time of the month again for all the fresh and new scrapbooking challenges out there in the online scrapping land.

I am sharing with you today my design team layout for Kraft Plus Challenges.

Here is the link to head on over to the blog to have a look at the awesome inspiring layouts from the Design Team and sponsors. 


We would love to see your creation!!


My Colour Scheme! - Royal Blues - Graphic curtesy of Color Adobe on Google

Image result for royal blue colour


Here is my layout, the background is created using a royal blue - Daler Rowney Acrylic Ink, a Charms Creation DIY Arrow, Memory Maze chipboard covered in embossing powder from Colour Blast in Just Blue and a handmade royal blue hessian tassel.


Here are some close ups of the finer details - 


Thanks for stopping by the blog today - make sure you leave some love xx

Elisa 


'Frosty' by Elisa Ablett

  Hi Crafters, Elisa here from the design team for Ink Art Designs with the first of my 'Christmas in July' projects. For this proje...