Monday, 30 October 2017

New Life by Elisa Ablett

Hi Everyone,

My turn up on the Scrap Matrix blog today with a very vibrant mixed media layout featuring a load of 13 Arts products including the 'Aria's Story' collection.

I started the background using the 13 Arts 'his time' stencil along with black modelling paste and some stamping using a small Paper Artsy Stamp

I hand coloured the chipboard feather and a white Satin flower with yellow Ayeeda Ink and a black ink pad.

I also fussy cut the 13 Arts feather stickers to fit in the right hand side cluster of embellishments. 

I also added a cute round embellishment from Charms Creations.


Here are some of the products used from the Scrap Matrix Store !

Image 1


Image 1


!3 Arts Chipboard - Strength In Numbers


Y


Bird in a Circle


That's it from me today, make sure you head on over to the Scrap Matrix Store to have a look at all the gorgeous products in store.

Make sure you leave some love xx

Elisa xx


Sunday, 29 October 2017

October Mixed Media Kit - By Elisa Ablett


 Happy Weekend everyone!

Elisa here from the design team for Shop and Crop Scrapbooking with my layout designed for the awesome 'october-2017-mixed-media-mania-kit' plus a few sneak peek photos of my 'experiments' with the mica powder prior to starting my layout.

The October Kit was designed by ME!!
and contains the following:
1 pot of Colour blast Singing The Blues Mica powder
1 pot of Colour blast Tangareen Dream Mica Powder
1 Scrapfx Stencil
1 piece of Cocoa Vanilla TOtally Rad PP
1 6x8' Cocoa Vanilla Studio You Rock Sticker Sheet
1 pieces of white mixed media cardstock
1piece of Black Cardstock
30cm of Green Tara Black Cobweb Ribbon

plus instructions to complete the layout below!

If you would like to purchase the kit, head over to the shop - october-2017-mixed-media-mania-kit-one-off-purchase and at checkout use the code EA5 for an added discount!! 


Here is the awesome Scrap Fx stencil - Cool Circles
Cool Circles stencil

Two Colourblast Mica Powders.

Pop Up Image


Pop Up Image


Before i started the layout i wanted to have a little play with the mica powders to decide on which direction i was going to go, so i mixed the mica powder with modelling paste, gel medium, water and i was also going to emboss with it.


When using the Mica powder with gel medium i found the colour to be very strong and also dried to a glossy almost enamel finish. Also i added water to a small spray bottle and added a small amount of the powder in the water and as you can see from the left side of my experiment sheet, the results was a lovely shimmering spray.


I decided on using the powder mixed with modelling paste for my layout, modelling paste in my opinion is one of the best to put through a stencil and doesnt dull the colour of the powder too much.

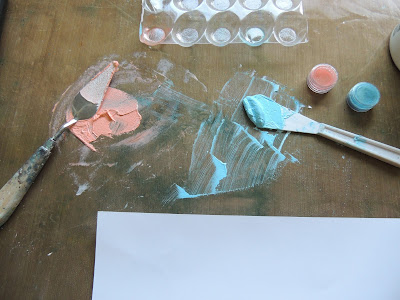
So on a craft sheet i mixed the powder with a small amount of modelling paste and folded it over and over with a palette knife, adding more powder to increase the vibrancy of the colour. Then apply through the stencil on your layout.

Its a fabulous kit to learn more about stencilling and mica powder and mixed media techniques.


Here are my close ups!


Thanks for stopping by the blog today!

Elisa 

xx

Monday, 23 October 2017

Allow your Soul to Grow by Elisa Ablett

Hi everyone,

Elisa here from the Scrap Matrix design team with my layout created for the Watercolour and Words challenge. I thought i would share the close ups of the finer details of the layout and a handy step by step tutorial on how i put the layout together.

The main focus of my layout was using the Ayeeda Water Inks from 13 Arts and the versatile 13 Arts - Strength in Numbers Chipboard Sheet.


Here is my finished layout, I love the boho look of the watercolours and flowers so I decided to continue that on with some hand drawn flowers and vines.


Lets have a look at how I used my focus products to create my layout:


Step 1 - I drew a very faint line halfway down the page and then sprayed water onto the bottom half of page tilting the page to let the water run down. Then drip the pink and scarlet Ayeeda ink onto the water letting it pool in the water that you have sprayed on.


Step 2 - Add a couple more colours to your page, you can use a pipette to have more control where your colours end up.


Step 3 - While your page is still wet add 13 Arts Splash Glitter Ink - Pink using the dropper provided.


Step 4- Ink your chosen chipboard Kinder Kreations Zen Leaf Chipboard with a black ink pad and let dry, once dry thread the wire ends of your Green Crystal Stems through the chipboard leaves.


Step 5- to start your flowers ready for fussy cutting - Spray your craft mat liberally with water and then add drops of ink onto the water, grab a piece of white mixed media cardstock and turn it upside down and smooth over the ink. You will end up with a sheet of coloured paper ready for you to stamp on. I did two of these sheets and made one with darker colours and one with more violet and green. Put it them aside to dry. You can also flick water onto the page to create a distressed look like the photo below.


Step 6 - Once your background has dried, grab a black marker and hand draw (or zentangle) (or if you aren't confident in drawing download a free template, or trace a design in)


Step 7 - I found an old transparency from Kaisercraft and cut it up to use as a feature piece on my layout then layered German Scrap - renaissance-petite-black trim and German Scrap - ornate-garland-2-black and black /molossi-crystal-lines


Step 8 - Glue down your chipboard pieces and crystal gem and Scrap Matrix metal- leaf-pretty-silver as pictured above, add some stamping and extra crystals.


Step 9 - Now onto the stamping, I used an awesome set of stamps (Paper Artsy -e-tracy-scott-11-a5-set) that are available in the Scrap Matrix store today. I stamped on both sheets of paper that I made with the coloured backgrounds. I then fussy cut all the pieces out.


Step 10 - Glue your photo down along with the green fussy cut border like the photo below.


Step 11 - Layer all your pieces by using 3D foam mounting dots and glue


Step 12 - Using the pink glitter ink from 13 Arts and the dropper provided add small drops to the butterfly as an added feature.


Step 13 - Pick your desired Chipboard and stickers - I used 13 arts 'Small saying's stickers and 13 Arts chipboard. Colour your chipboard with your green watercolour 13 Arts ink and let dry, once dry glue it to your layout. Also add your sticker to your page, i added mine to the side of my photo.


Here are some close ups of the finished layout!


Well that's it from me! 

I hope you have enjoyed the tutorial and seeing how my layout came together.

Don't forget to leave some love and make sure you visit the store either in person or online to say Hi! and check out all the wonderful and unique products.

Hugs

Elisa xx


Saturday, 21 October 2017

Dream Big - By Elisa Ablett

Hi Everyone, 

My turn up on the Shop and Crop blog today with something a little different for me - BACK TO BLACK!

I don't normally do a black cardstock background but with the Distress Oxide Inks, an awesome stamp set and a cool technique or two and the I just wanted to try one.


Here is a step by step tutorial on how I made the gorgeous flowers with the distress oxide ink pads.


Step 1 - using a nice smooth black cardstock, ink the middle of your stamp with the 'wilted violet' oxide ink pad and the the outsides of the stamp with the 'picked raspberry'. Then using the smaller of the stamps use 'cracked pistachio' ink pad. 


Step 2 - Stamp all over your black cardstock, as you can see the Oxide Ink pads stamp beautifully over the black and come out in almost chalky neon colours.


Step 3 - Smudge your ink pads onto your craft mat and spritz with water liberally. Then using a paint brush splat and drip the liquid onto your cardstock over the top of your stamped images.


Step 4 - Add a bit more colour to the page by turning the cardstock upside down and dipping the flowers into the liquid on your mat and smoothing the back of the page with your hand. A close up below.


Step 5 - I also used the paint brush to add shading and colour to the inside of the flowers. 

Then lastly once they have dried, I fussy cut the flowers out and then using a white gel pen added white dots to the middle of the flowers as you can see from the close ups!


Here are the close ups for the finer details!


Here are the products used to create my layout from the Shop.


Prima Bloom Floral stamps only available in the one off mixed media mania kit.
Image result for prima bloom floral stamps


Preorder : Tim Holtz Distress Oxide Ink Pad Bundle 2


Thanks for stopping by the blog today 😀

Elisa xx


'Frosty' by Elisa Ablett

  Hi Crafters, Elisa here from the design team for Ink Art Designs with the first of my 'Christmas in July' projects. For this proje...